Search for answers or browse about Sintel Forms.
Install Sintel Forms for Microsoft 365
Sintel Forms is available as an Add-in for Microsoft 365 from AppSource and in order to use it you must add it into your Microsoft 365 tenant.
It can be added in 2 ways:
- Option 1 A SharePoint Administrator installs Sintel Forms on behalf of their organization
- Option 2 A SharePoint site owner requests the app to be installed on their specific site
Option 1 – A SharePoint Administrator Installs the App
A SharePoint Administrator can install Sintel Forms on behalf of the entire organization, this is a simple 1-step process whereby the SharePoint Administrator just adds the app from AppSource.
Important: You must have access to the SharePoint Admin Center and be able to add apps to your Microsoft 365 tenant.
Prerequisites
Add the app to the tenant
- Open the SharePoint Admin Center
https://YourTenantName-admin.sharepoint.com/_layouts/15/online/AdminHome.aspx#/home - Click “More features“
- Under the Apps section click on “Open“
- Click on the “App Catalog”
- Within the AppCatalog click on “SharePoint Store” from the left menu
- Search for Sintel and choose “Sintel Forms“
- Add it by clicking “Add to app catalog“
Option 2 – A SharePoint site owner requests the app
A SharePoint site owner user can request the Sintel Forms app be added to their site and once the request is approved by a SharePoint Administrator the site owner can add the app to their site. This is a 2-step process whereby a site owner first requests the app and then the SharePoint Administrator adds the app from AppSource.
Step 1 – A site owner requests the app
- The Site owner opens their site
- Click on “New->App” or click on “Settings->Add an app“
- Click “From SharePoint Store“
- Search for Sintel and choose “Sintel Forms“
- Click “Request“, enter a reason, and click “Send request“
- The site owner will receive a message that the request has been sent
Step 2 – The SharePoint Administrator approves the request
- The SharePoint Administrator opens the SharePoint Admin Center
https://YourTenantName-admin.sharepoint.com/_layouts/15/online/AdminHome.aspx#/home - Click “More features” from the left menu
- Under the Apps section click on “Open“
- Click on the “App Catalog” link
- Click “App Requests” on the left or the “Manage requests of apps” tile on the right
- On the top you a message may appear:
A newer version of this page is now available. Try the new App requests page. Click the “Try the new App requests page“ - Select the Sintel Forms app, enter an optional comment, and then click “Approve and add this app“
- The site owner can now add the Sintel Forms app into their site.
Authorizing the Add-in (optional)
This step is only required for tenants created after August 2020. For these tenants, a tenant admin will have to complete one additional authorization step.
- In some cases, after a user clicks on the Sintel Forms Add-in tile within the site contents to open the app homepage they will receive the following dialog
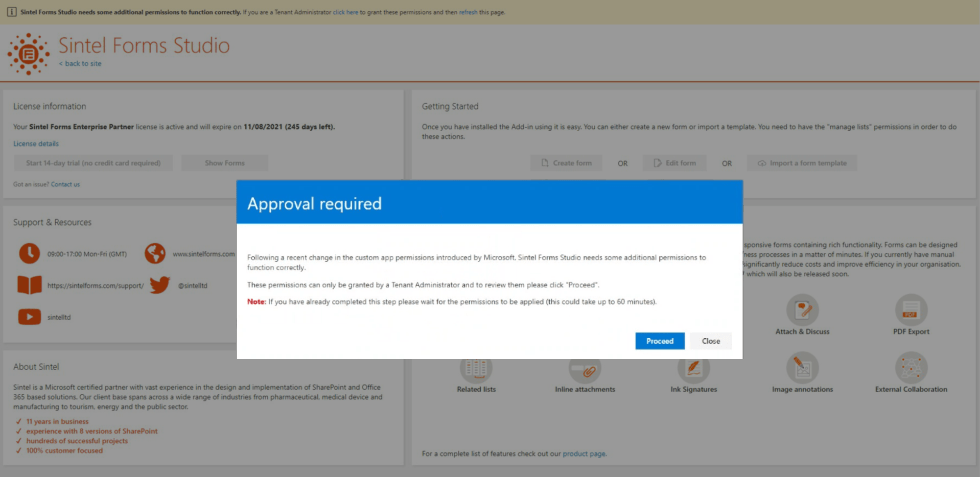
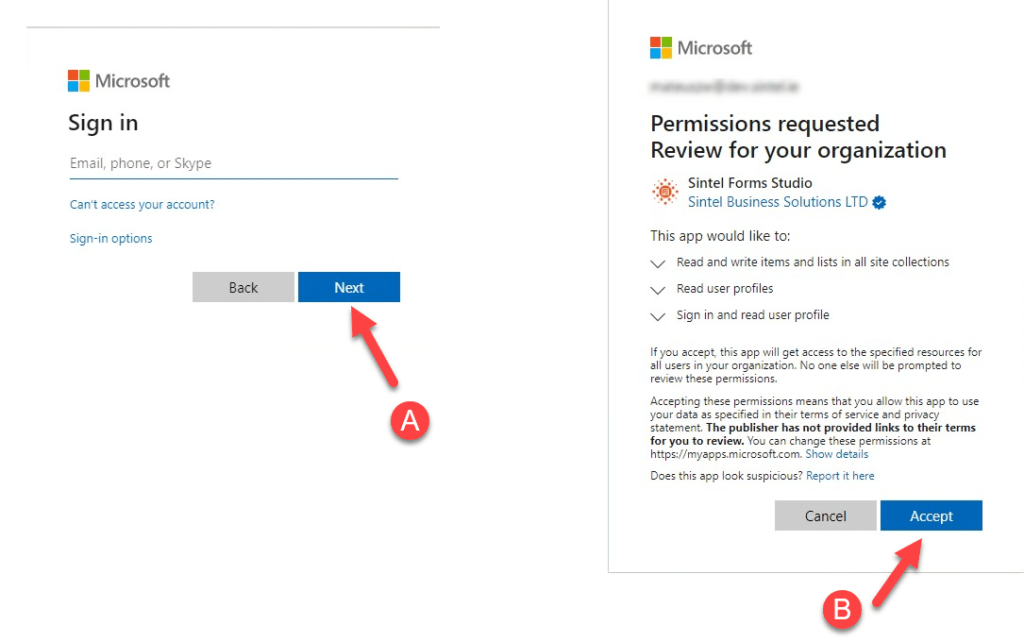
- A tenant admin simply needs to click Proceed which will open a new browser tab and request them to (A) Sign in and (B) Authorise the app.
- Once they click Accept they will be redirected to a screen that will attempt to verify that the updated permissions have taken effect. They can either wait for the permissions to be verified or you can close this tab.
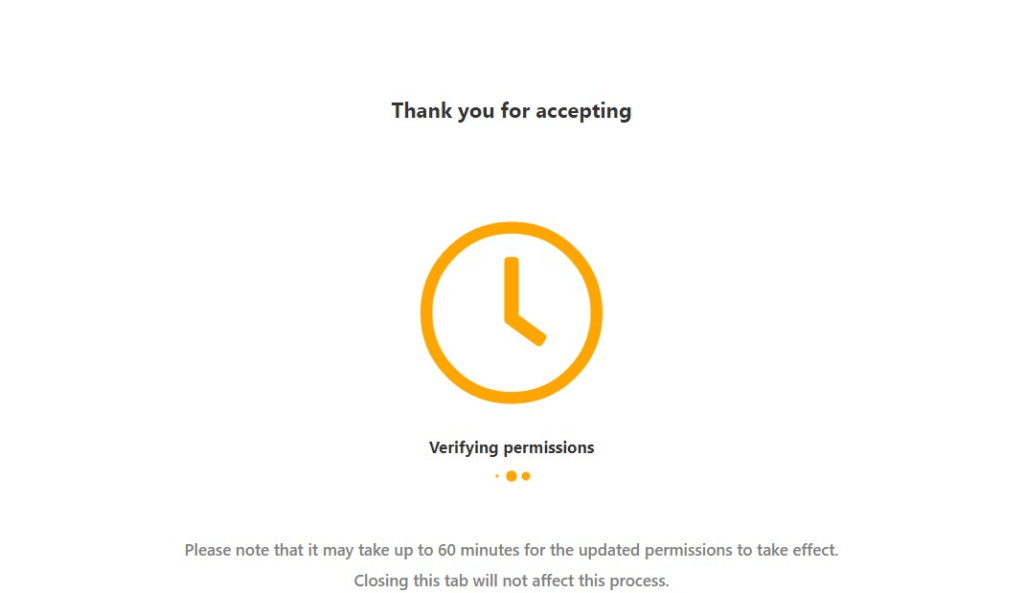
Whether they choose to close the tab or leave it open it is important to note that it could take up to 60 minutes for the permissions to be applied (this process is entirely dependent on Microsoft 365). - If they leave the tab open, once the updated permissions have taken effect they will see a green icon and message confirming this.
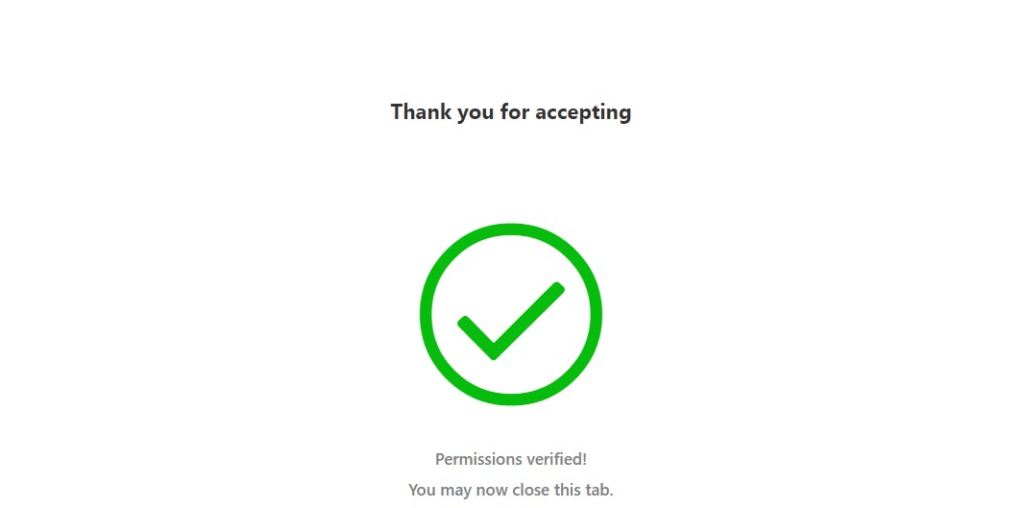
- They can then close the tab and return to the tab containing the Add-in homepage and refresh the page by clicking the link at the top of the screen or hitting F5 or pressing the refresh button in their browser.
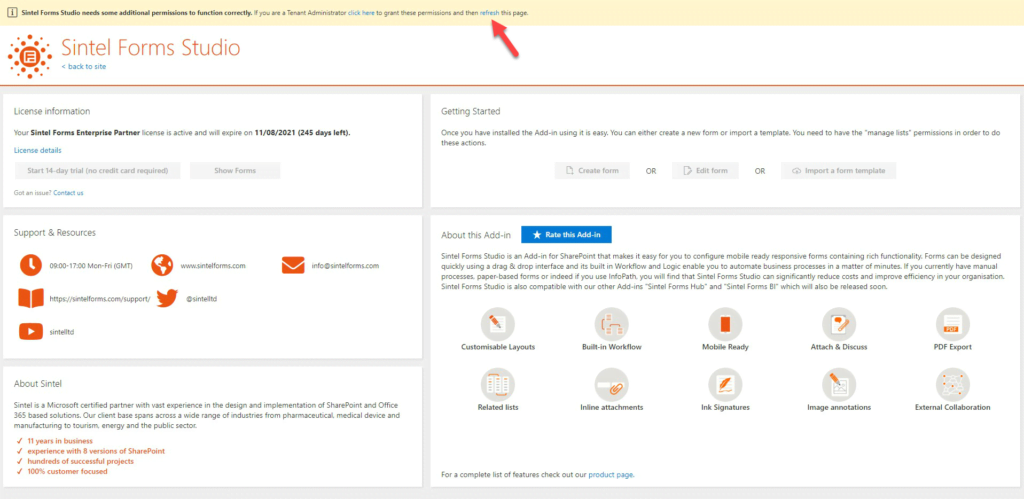
- Once the page is refreshed the information message at the top should disappear and the Add-in should now be ready for use.After they have accepted the permissions update it could take up to 60 minutes for the permissions to be applied (this process is entirely dependent on Microsoft 365). If they have previously accepted the permissions previously please wait for up to 60 minutes for them to take effect.
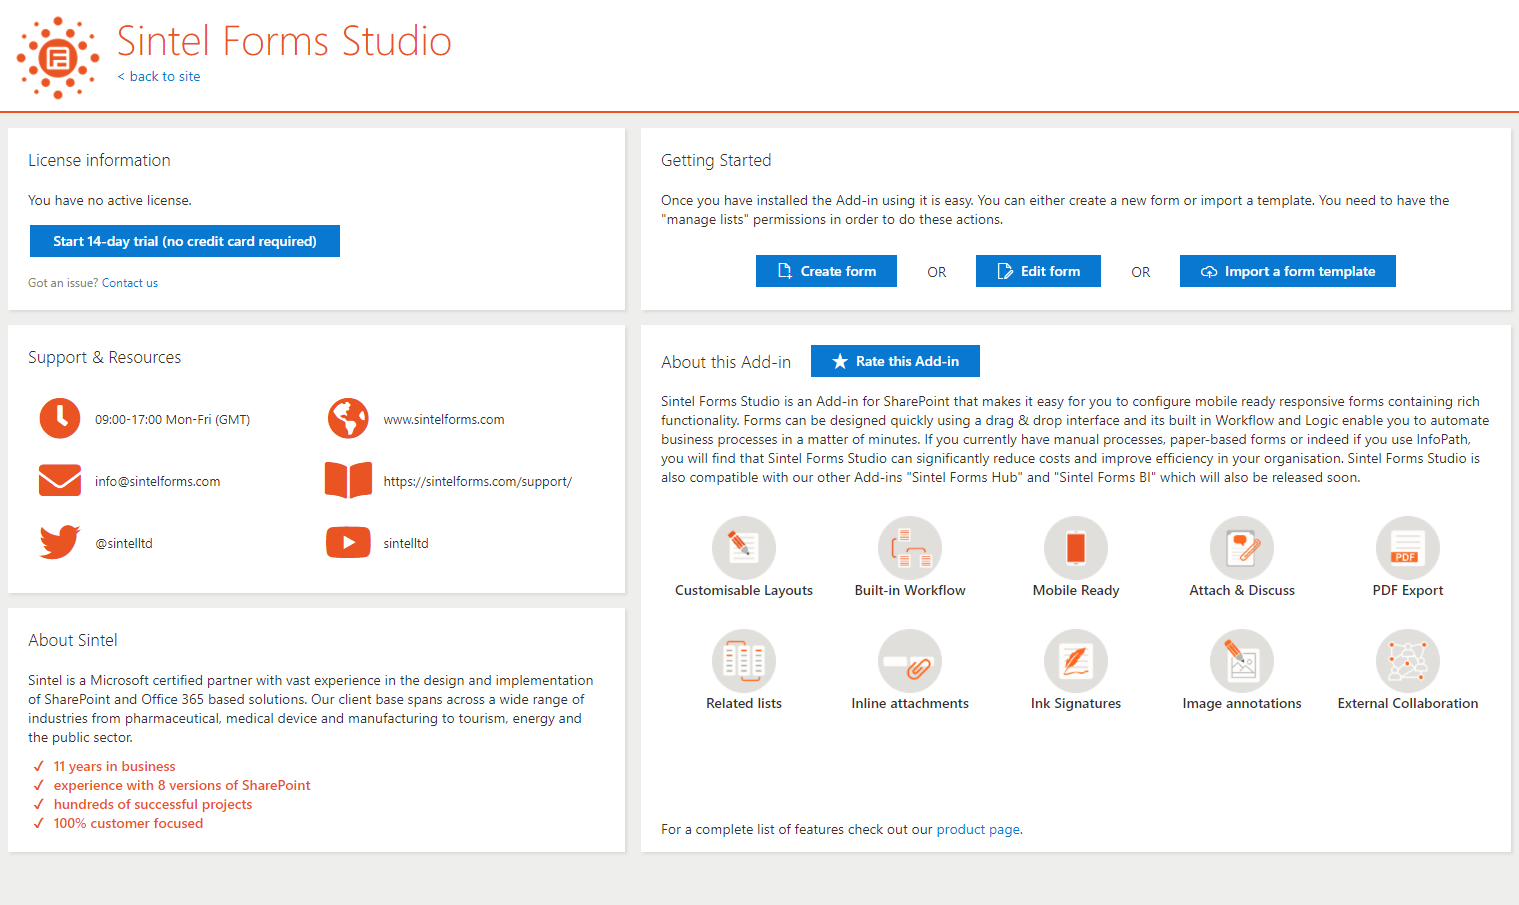
Activating the 14-day trial
- Once you have added Sintel Forms to your tenant you need to activate it before it can be used.
- To do so you simply need to click on the Sintel Forms Add-in tile within your site contents to open the app homepage and then click Start 14-day trial.
- You will be prompted for some details and once you have entered them your 14-day trial will be activated immediately.
- After the trial is over you can proceed to use the free version or purchase a license and to do so you simply need to open the app homepage again and click on the “Use free version OR purchase a license” option.