Search for answers or browse articles about Sintel Forms
Using a Linked List
Sintel Forms empowers you to incorporate one or more linked lists seamlessly into your forms. This feature mirrors the functionality of InfoPath’s repeating table, but with a distinctive twist – Sintel Forms neatly stores this data as individual list items in a linked SharePoint list.
You can use a linked list within a Sintel Form through two methods:
- Add the linked list to the Sintel Forms Designer (the new way)
- Create a linked sublist with a lookup column and manually add it to the form (the old way)We recommend creating the linked list using the new approach, however, both of these options achieve the same result and are explained here:
Steps to create a form containing a linked list through the Sintel Forms designer (the new way)
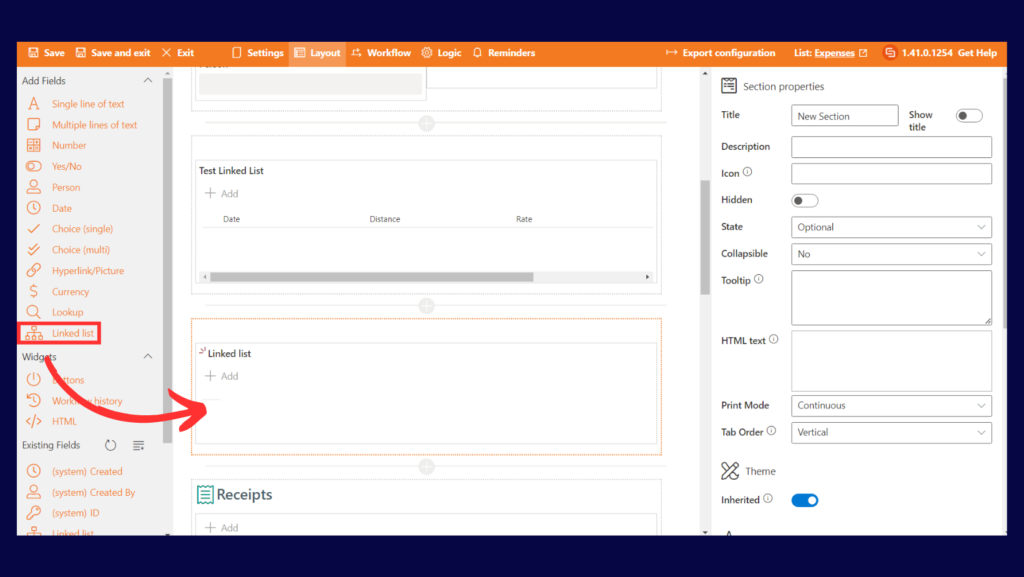
It is now possible to create linked lists from the Sintel Forms designer. There is a draggable item called “Linked list” in the “Add fields” section.
Once you drag this onto the form a linked list field is created virtually in the designer. The list title is configurable prior to saving the form.
Once the configuration has been saved, the new child list is created and the configuration is updated with the server-generated values e.g. list columns. list id etc.).
- Add the linked list field to a container: Within the properties, you can then give your list a title, a label and apply any other settings you wish.In this example, I have given the linked list the title ‘Travel Receipts’, and set the label to ‘Hidden’. I have given the section the title ‘Receipts’ and added an icon.
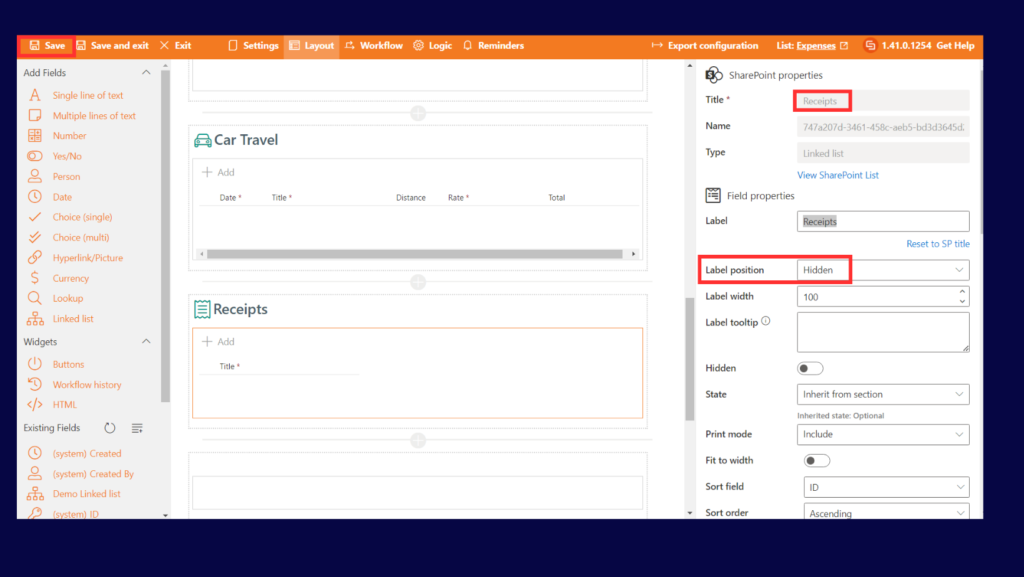
- Next, Click Save
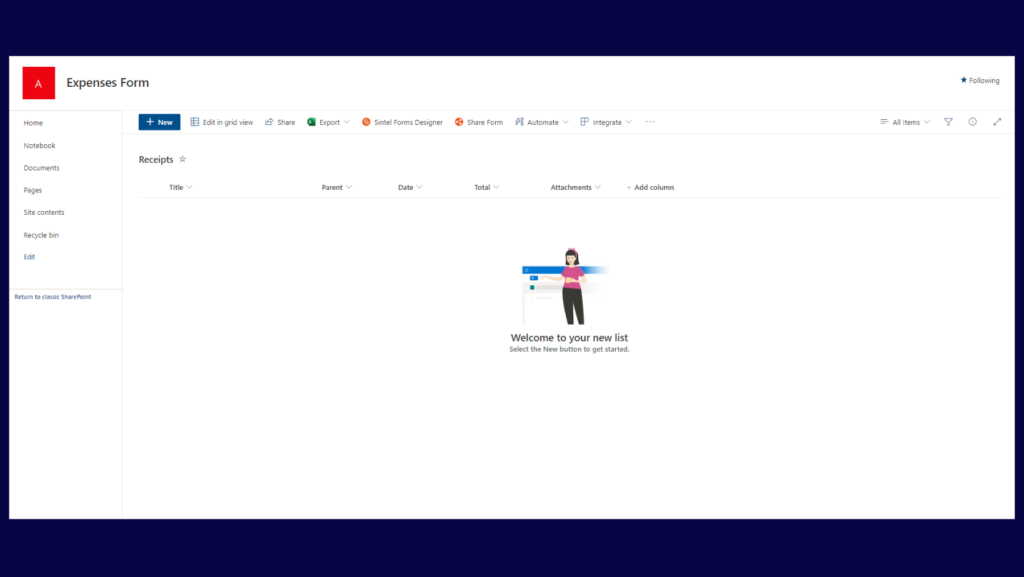
- Navigate to the forms main list and select site contents
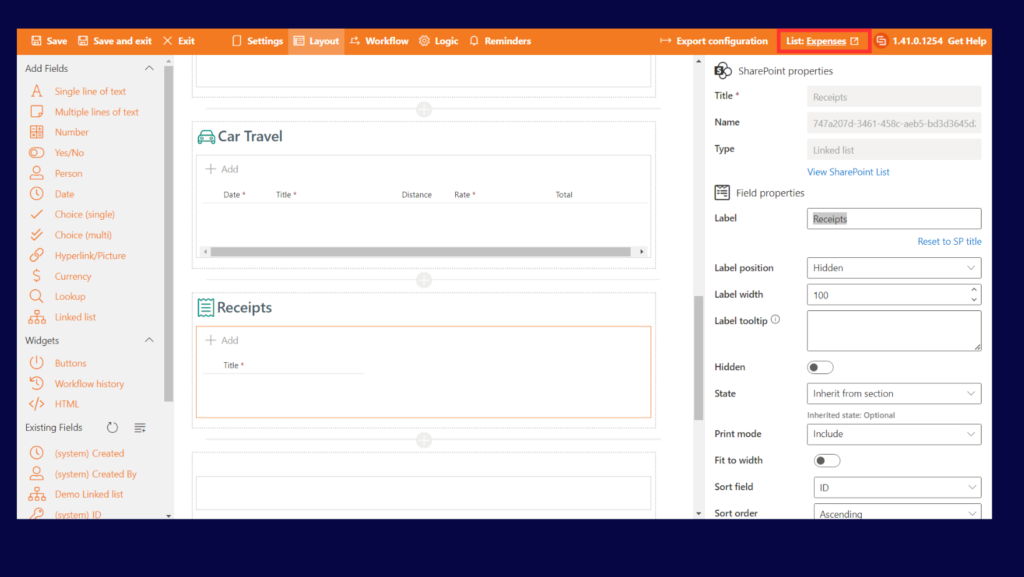
- Select the ‘Receipts’ list
- Add your columns:
Select add new column and add the relevant columns for your linked list. In my example I want the user to be able to add receipts as expense items therefore I have added:
i. A date and time field and named it ‘Date’
ii. An attachments field
iii. A currency field and named it ‘Total’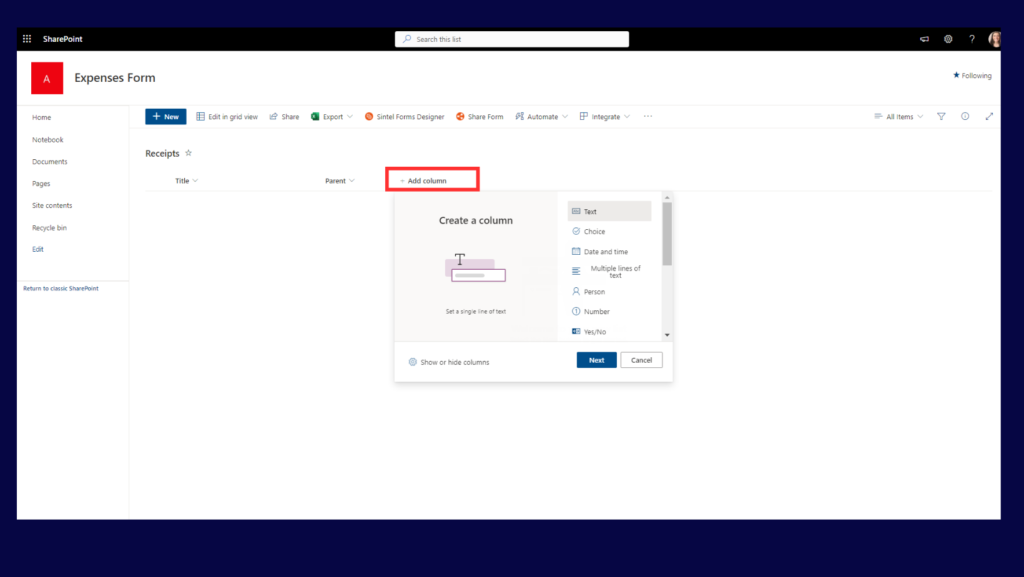
- Navigate back to the Sintel Forms designer:
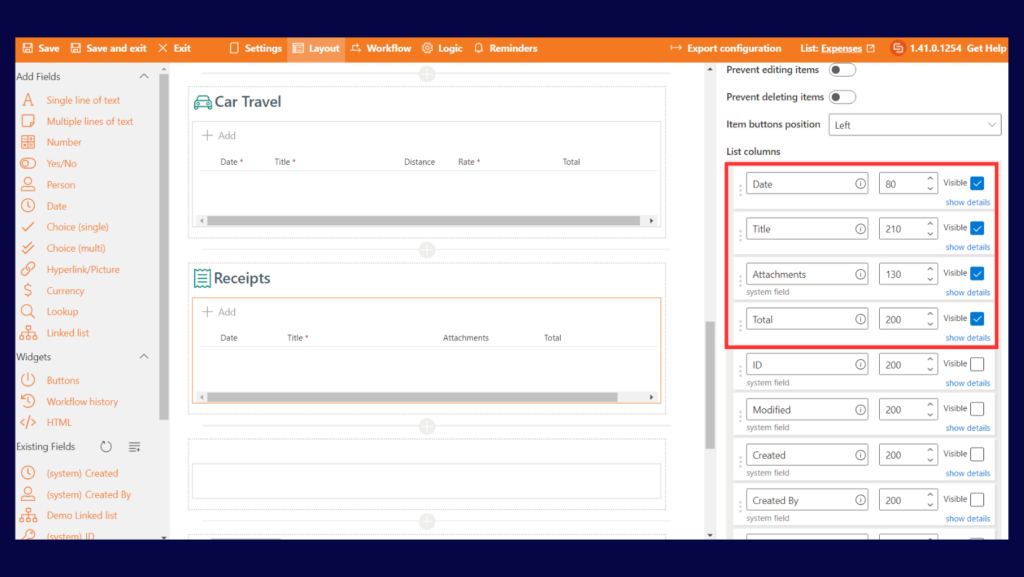
Refresh the page and select the linked list.
In the ‘List Column’ section of the properties, you have the freedom to choose which columns should be visible and adjust the width of these columns on your form.
- Save and Exit: now you can enjoy adding related items
Steps to manually create a form containing a linked list (the old way)
- Create the main list: This will be the list storing the form data, in our example, it will be called “Requests”
- Create a linked sublist: This list will allow adding child items into the form, in our example, we will call it “Request Details”
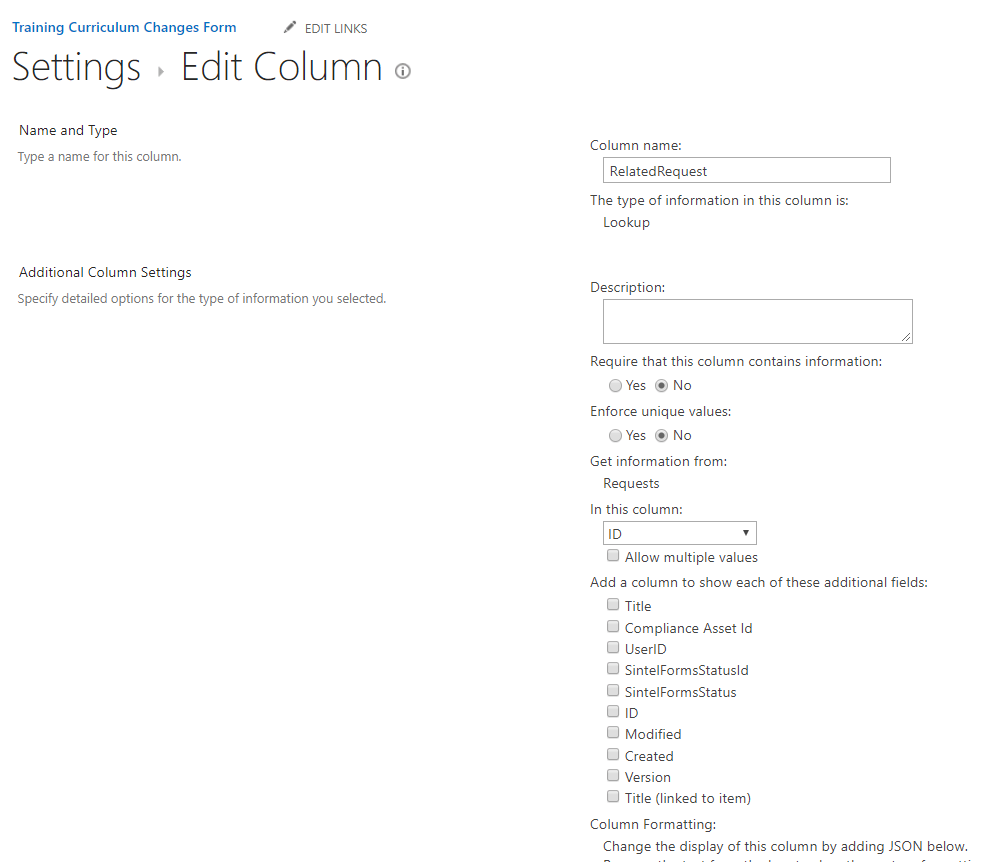
- Create a lookup column: This lookup column must be created in the linked sublist (“Request Details”) and it will look up the main list (“Request”) in our example we will call it “RelatedRequest”.
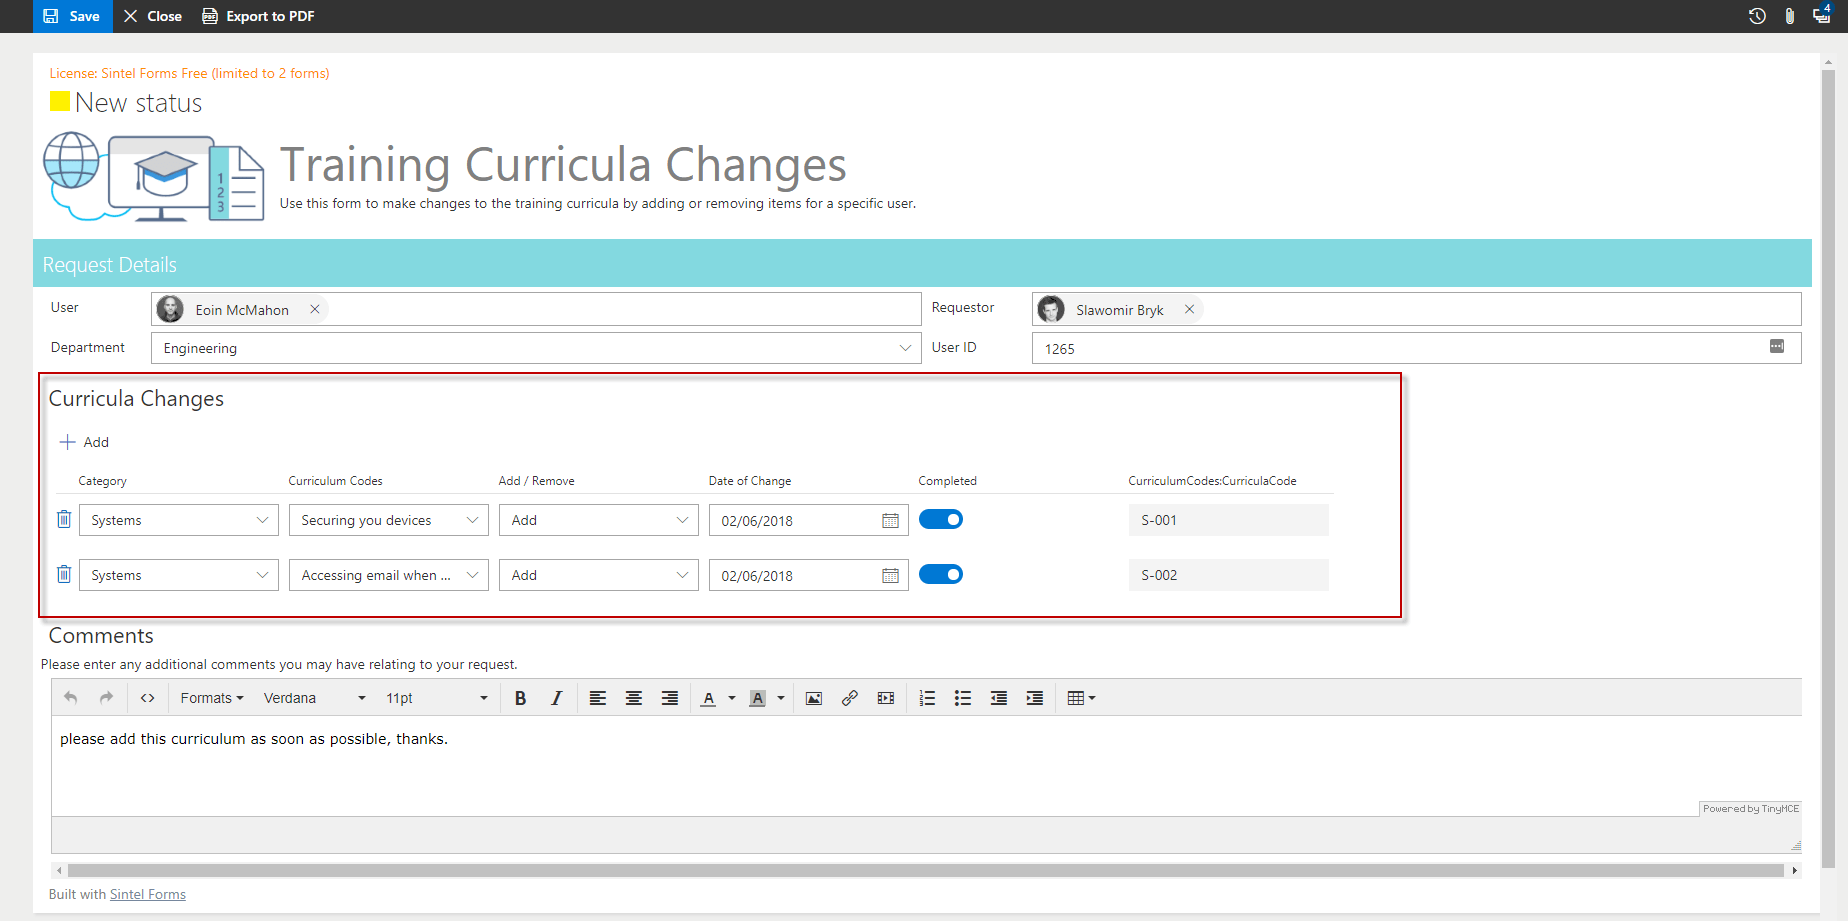
- Place the linked list on the form: Once the linked sublist is created and it contains the Lookup column you can launch the Sintel Forms Designer on the main list. The “RequestDetails” linked sublist will appear in the List Fields section. Drag the RequestDetails and drop it into a section. In the example below RequestDetails will be dropped into the “Curricula Changes” section.

- Configure Linked List columns: After the RequestDetails is placed inside a section, click it in the designer area to open its properties. You can now show/hide columns, change column width and adjust other properties.
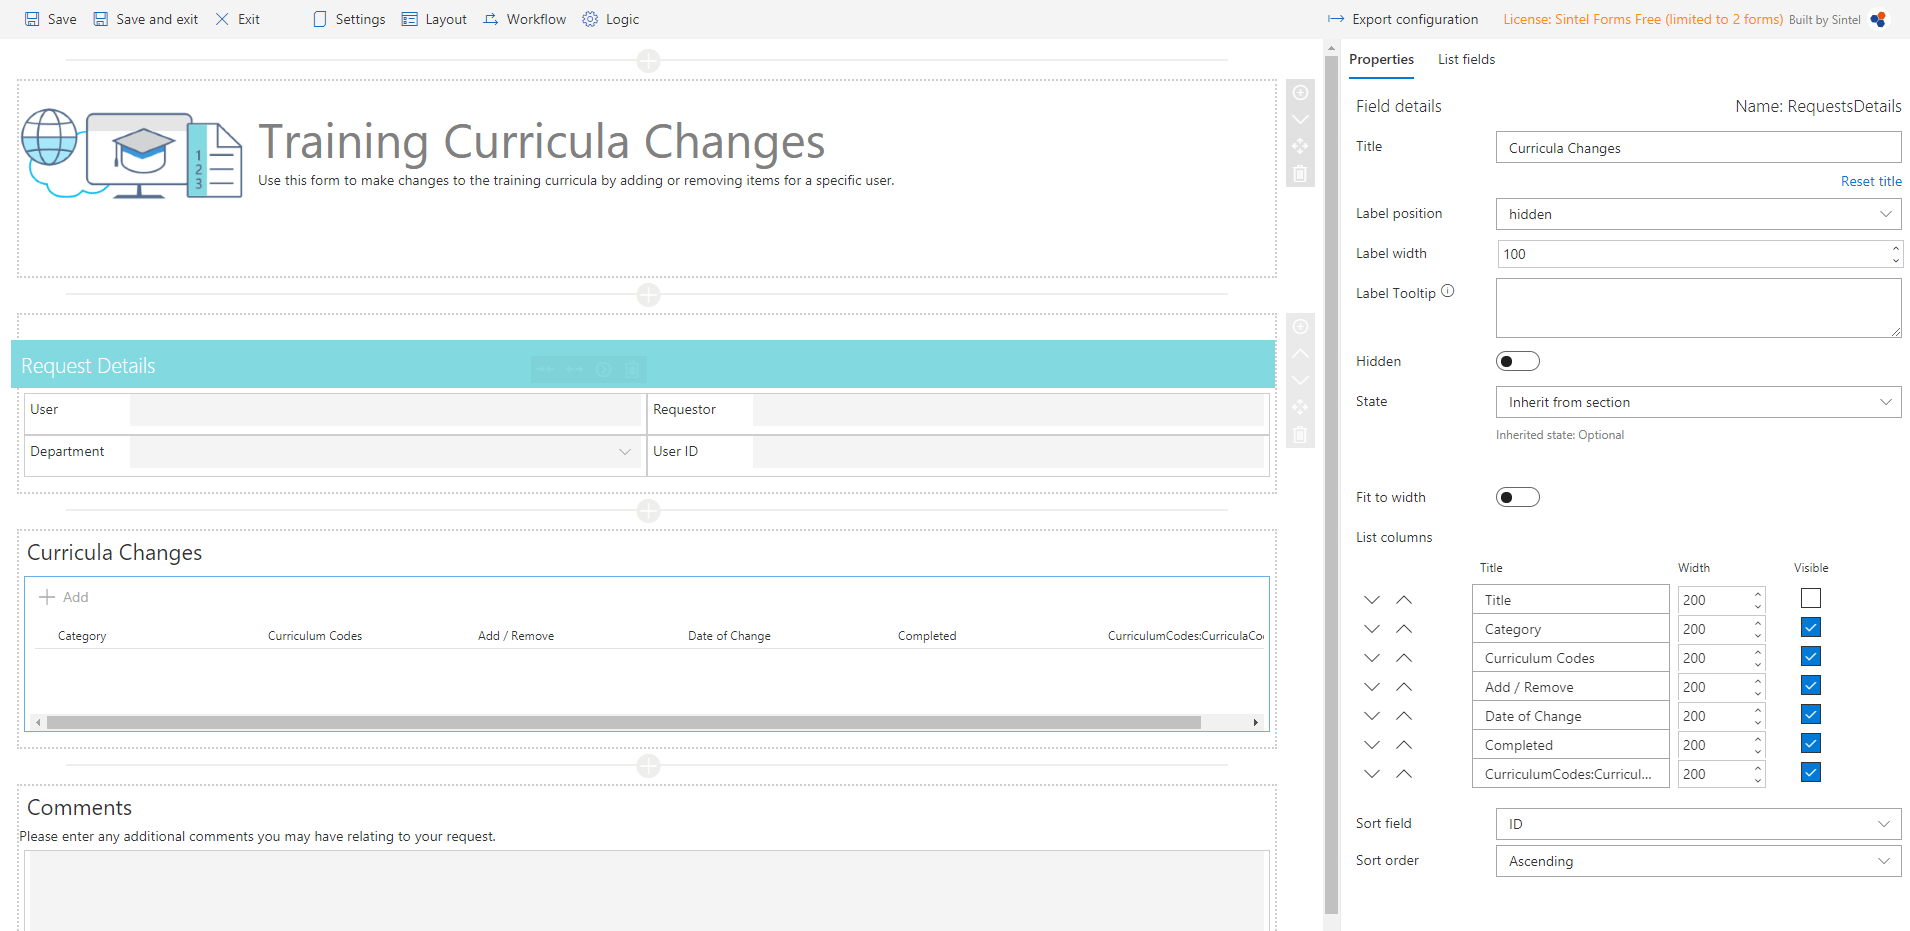 When you add a new column to the linked list within the layout, it starts out hidden as the default setting. Therefore, after making any modifications, remember to navigate to the Linked List properties and activate the ‘Visible’ flag.
 - Save and Exit: now you can enjoy adding related items.