Search for answers or browse articles about Sintel Forms
Workflow: Email
How Emails Are Sent in Sintel Forms
Sintel Forms supports automatic email notifications as part of its workflow engine. Emails can be sent in the following scenarios:
-
When a form transitions from one status to another.
-
When an action is assigned to specific users or groups
Sender Addresses (From Address)
Depending on the recipient type, Sintel Forms uses different sender addresses:
-
Internal users receive emails from:
Site Name: <no-reply@sharepointonline.com> -
External users or Distribution Lists receive emails from: notifications@sintelforms.com
Changing Default Email Behavior
✅ To send emails to Distribution Lists from
Site Name: <no-reply@sharepointonline.com>
-
Add the DL to a mail-enabled security group.
-
Configure the workflow to send emails to this security group, not directly to the DL.
✅ To use a custom “From” email address
If you wish to change the emails that normally come from notifications@sintelforms.com to come from another email address of your choice, see Configurable from email address.
Supported Recipient Types
Sintel Forms supports sending emails to the following:
-
Microsoft 365 users (single or multiple)
-
SharePoint groups (if group membership is visible)
-
Mail-enabled security groups (with external senders enabled)
-
Enabled shared mailboxes (best used by adding to a SharePoint group)
-
“Person or Group” fields from the form
-
“Single line of text” fields from the form (multiple emails separated by a semicolon 😉
-
External users assigned to the form
-
Any valid email address (internal or external)
-
Distribution lists (with external senders enabled)
⚠️ Warning:
Sintel does not recommend using Distribution Lists directly.
Emails to DLs are treated as external and sent from notifications@sintelforms.com, which may confuse recipients used to internal addresses.
Instead, add DLs to a mail-enabled security group, which allows emails to be sent from no-reply@sharepointonline.com maintaining consistency with other internal communications.If you must use distribution lists we recommend that you add them into a mail-enabled security group and then configure the workflow emails to send to that mail-enabled security group. In this way the emails that are received by the members of the DL will come from Site Name <no-reply@sharepointonline.com> just like all other emails sent to your other internal organizational email addresses.
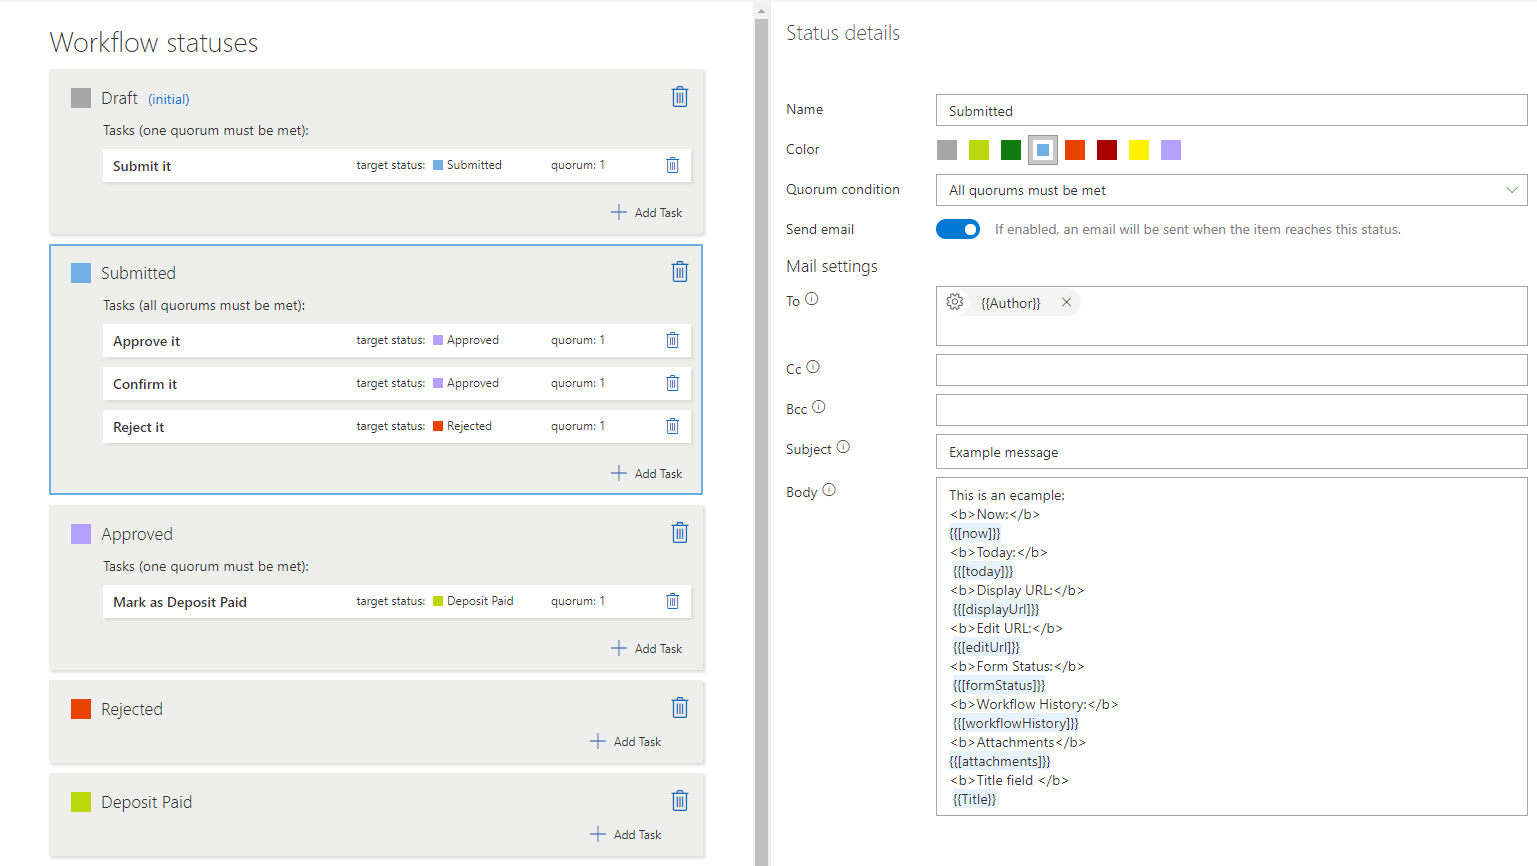
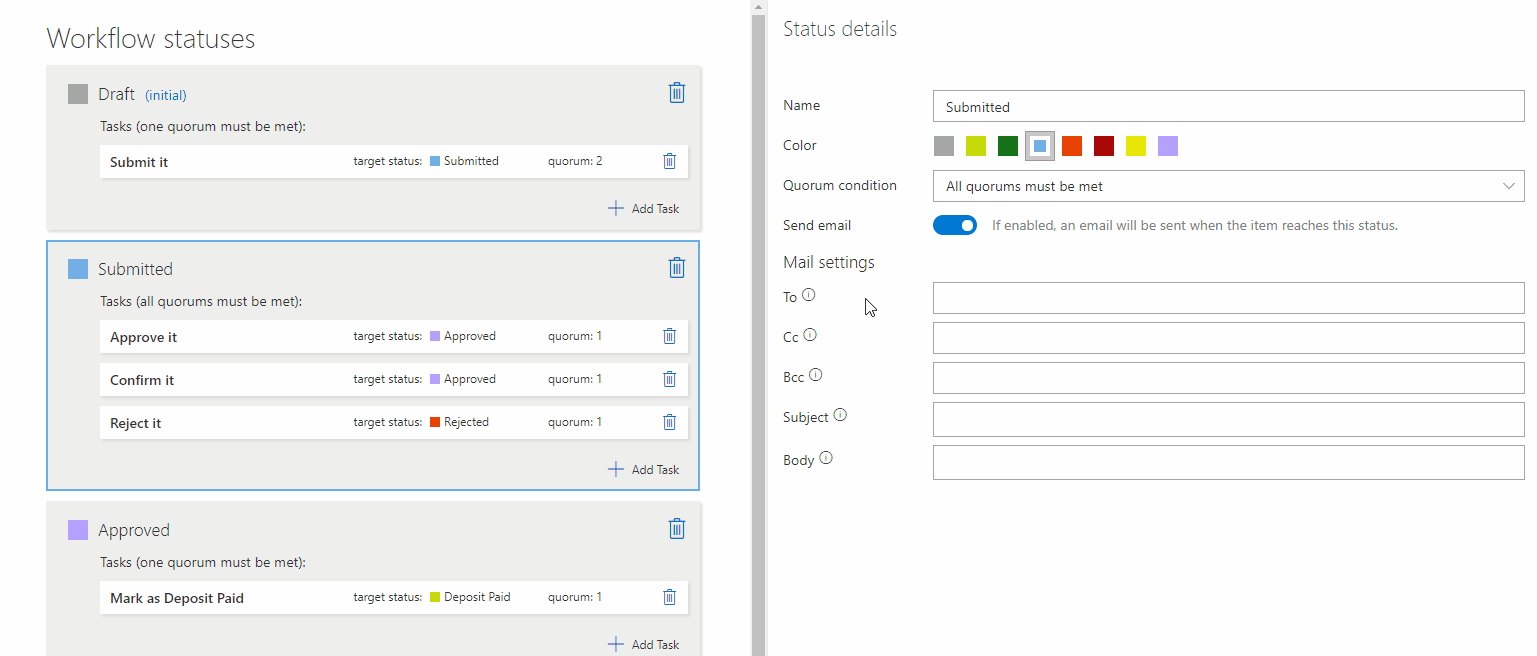
1. Email Recipients Configuration
Use the familiar To, Cc, and Bcc fields to configure recipients:
-
To – Direct recipients of the message.
-
Cc – People to be informed (others will see their addresses).
-
Bcc – People to be informed privately (others will not see their addresses).
? Smart Recipient Selection
-
Start typing to search for users or SharePoint groups.
-
Type a curly bracket { to choose from “Person or Group” or “Single line of text” fields in your form.
✅ Tip:
To send emails to multiple people via a “Single line of text” field, separate addresses with a semicolon:joe.bloggs@company.com;mary.bloggs@company.com
ℹ️ Important Note:
You cannot send emails using a Lookup field that references another list.
To work around this:
Create a “Single line of text” field.
Use logic to copy the value from the lookup field into this new field.
Use the new field in the To, Cc, or Bcc settings.
2. Email Content Configuration
Subject and Body Fields
You can embed dynamic form content using placeholders. Just type @ and choose from available form fields.
? Best Practice:
Include the app name in square brackets in the subject line for clarity.
Example: [Expenses App] Approval Request
Special Placeholders Available:
-
@now – Date and time the email is sent
-
@today– Date only
-
@displayUrl – Link to view the form
-
@pdfUrl– Link to generate a PDF of the form (&forcePdf=1 can be appended)
-
@editUrl – Link to edit the form
-
@formStatus – Current status of the form
-
@workflowHistory – Log of status/action changes with timestamps and users
-
@attachments – Links to any files attached to the form
ℹ️ Note:
@pdfUrlrequires that PDF export is enabled in Form Viewer settings.
Example
Configuration:
Output: