Search for answers or browse articles about Sintel BI
Data Sources
What is a data source
Within Sintel BI a data source refers to the location of your data. Data Sources are connected to components on your dashboards allowing you to visualize that data using a combination of data grids, charts, and other components.
Data source types
Sintel BI currently supports 2 types of data sources:
- This Site
Uses data in a list or library from within the current SharePoint site - This Tenant
Uses data in a list or library from within any SharePoint site within your tenant that you have access to
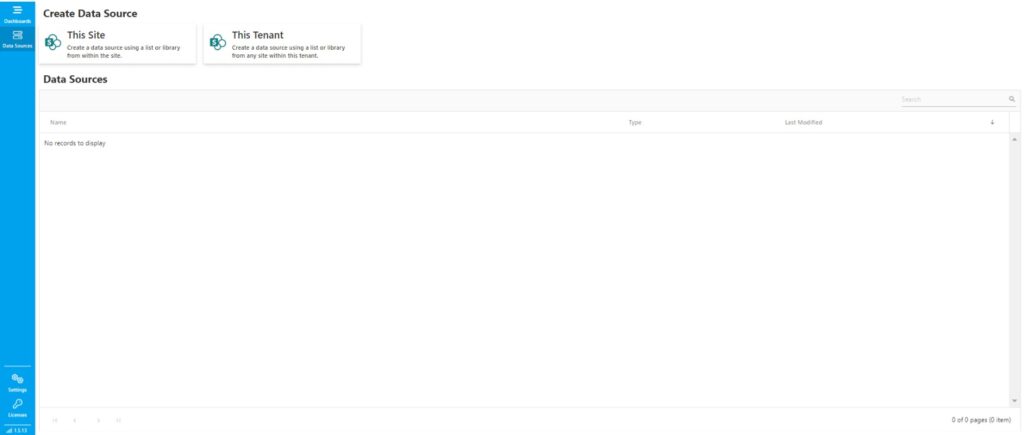
The data source screen can be found by clicking Data Sources on the left navigation menu in Sintel BI
Creating a data source
- Click on the Data Sources link on the left menu
- If you wish to use a list/library from within the current site then choose This Site or if you wish to use a list/library from another site then choose This Tenant
- If you choose the This Tenant option you will also need to enter the Web URL
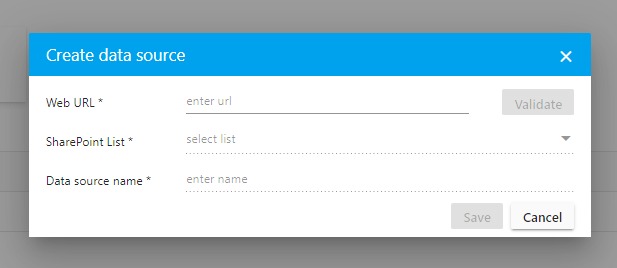
How to add a data source from This Tenant
- You can then choose a list and give the data source a name
- Click “Save”
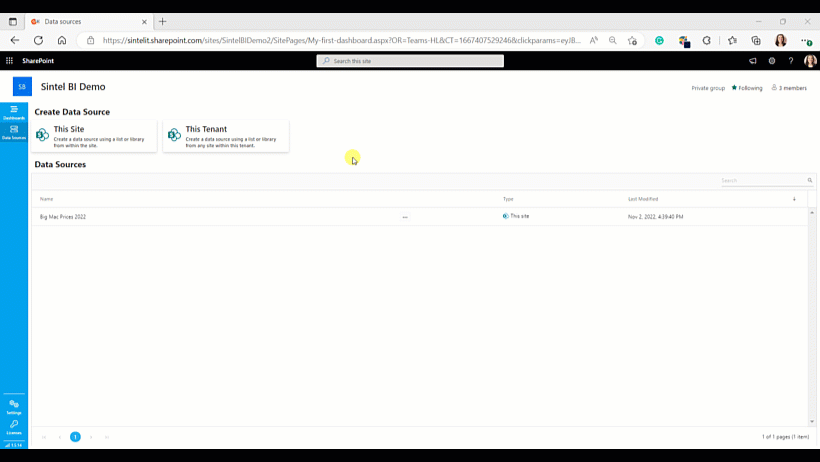
Your data source should now appear within your list of Data Sources.
Data Source Properties
Once you have added a data source there are a number of options available to you including:
- Editing
- Cloning
- Viewing source data
- Activating/Deactivating
- Deleting
Editing
You can make numerous changes to a data source including:
- Renaming a data source
- Select the current title
- Rename it
- Click Save

Renaming a Data Source
- Applying filters
- There are multiple ways of filtering your data in Sintel BI. You can of course filter the data on the dashboard itself or you can use data source filters which are applied to the data source directly. When working with large amounts of data it is useful to filter data from the data source itself as it enables you to work more efficiently.
- The filter operations which appear will vary depending on the type of field that is selected. For more information check out our article dedicated to filtering.
- Changing the default data limit (restricted to 200 items by default)
- By default, no more than 200 items are fetched from the data source but it is very simple to increase the limit or remove the limit entirely.
- Navigate to the data source page and select the three dots icon …
- Select edit
- Select the settings icon
- Enter a new data limit e.g. change from 200 to 300 or remove the data limit entirely by typing 0
- Select Apply
Remove the default data limit
- Showing and hiding fields
- Navigate to the data source
- Select the three dots … and click edit
- By default, all fields are shown you can click the eye icon to hide any fields you do not want to show.
- Lastly, click Save & Exit
Showing and hiding Fields
- Changing field order
- Navigate to the data source
- Select the three dots … and click edit
- Drag & Drop the fields in the order you wish them to appear
- Lastly, click Save & Exit

Changing field order
- Renaming fields
- Navigate to the data source
- Select the three dots ‘…’ and click edit
- Click on the three dots ‘…’ beside the field name
- Select Rename
- Change the fields name
- Click OK

Renaming Field-Note that a pencil icon highlights that a field has been renamed
- Preview data
- Navigate to the data source you want to preview
- Select the three dots ‘…’ and click edit
- Select Refresh
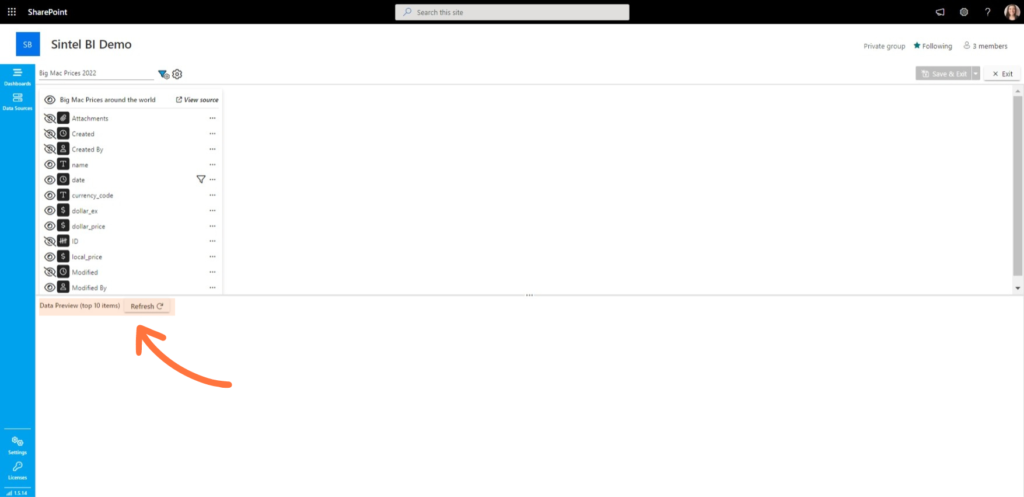
Preview Data
Other things to note:
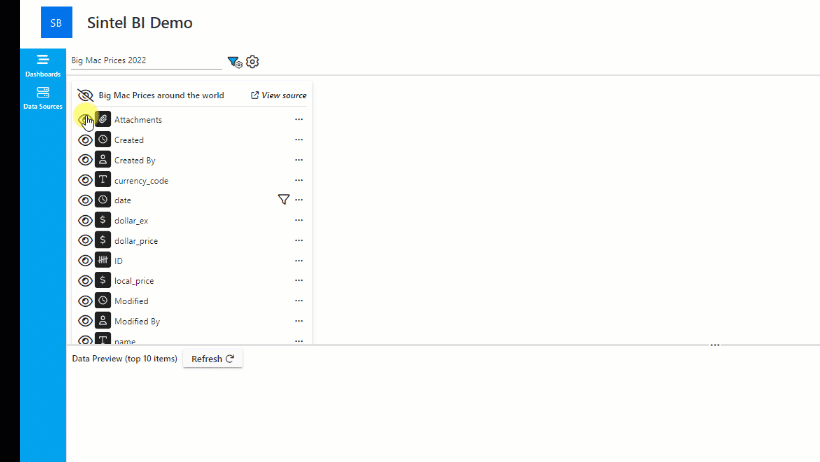
The different icons displayed represent the different field types Number, User, Text, Date, Choice, and Attachments.
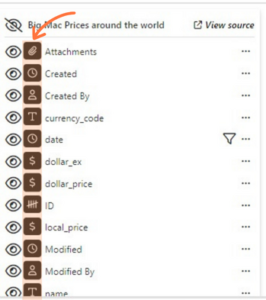
The icons represent different field types
Cloning
It is incredibly simple to clone your Data Source. This can be helpful when you need to duplicate similar data sources for different regions or departments.
To clone a data source:
- Navigate to the data source you wish to clone
- Click on the three dots …
- Select Clone
By default, the data source name will inherit the source components name, appended with the word ‘Copy’. We recommend that you change it to a name that suits you.
Viewing source data
We have made it very simple for you to go directly to where you are sourcing your data.
To view your data:
- Navigate to the data source you wish to view
- Click on the three dots …
- Select View source
Your original data source will then open in a new tab.
Activating / Deactivating
When you deactivate a data source, it will no longer send data to your Sintel BI dashboards.
To deactivate a data source:
- Navigate to the data source you wish to deactivate
- Click on the three dots … →
- Select Deactivate
If you wish to activate a data source after deactivating:
- Navigate to the data source you wish to activate
- Click on the three dots …
- Select Activate
Deleting a data source
Sometimes you no longer have use for a data source and there is no point in having it cluttering up your screen.
To delete a data source:
- Navigate to the data source you wish to delete
- Click on the three dots …
- Select Delete