Search for answers or browse articles about Sintel BI
MS SQL
An MS SQL connector, also known as an SQL Server connector, is a software component or driver that enables communication and interaction between applications or systems and Microsoft SQL Server databases. It acts as a bridge, facilitating the exchange of data and queries between the application and the SQL Server database.
The steps for adding an MS SQL data source differ from adding other data sources, so if you would like to add MS SQL as a data source follow these steps:
Adding an MS SQL data source
- Click on the Data Sources link on the left menu
- Select MS SQL
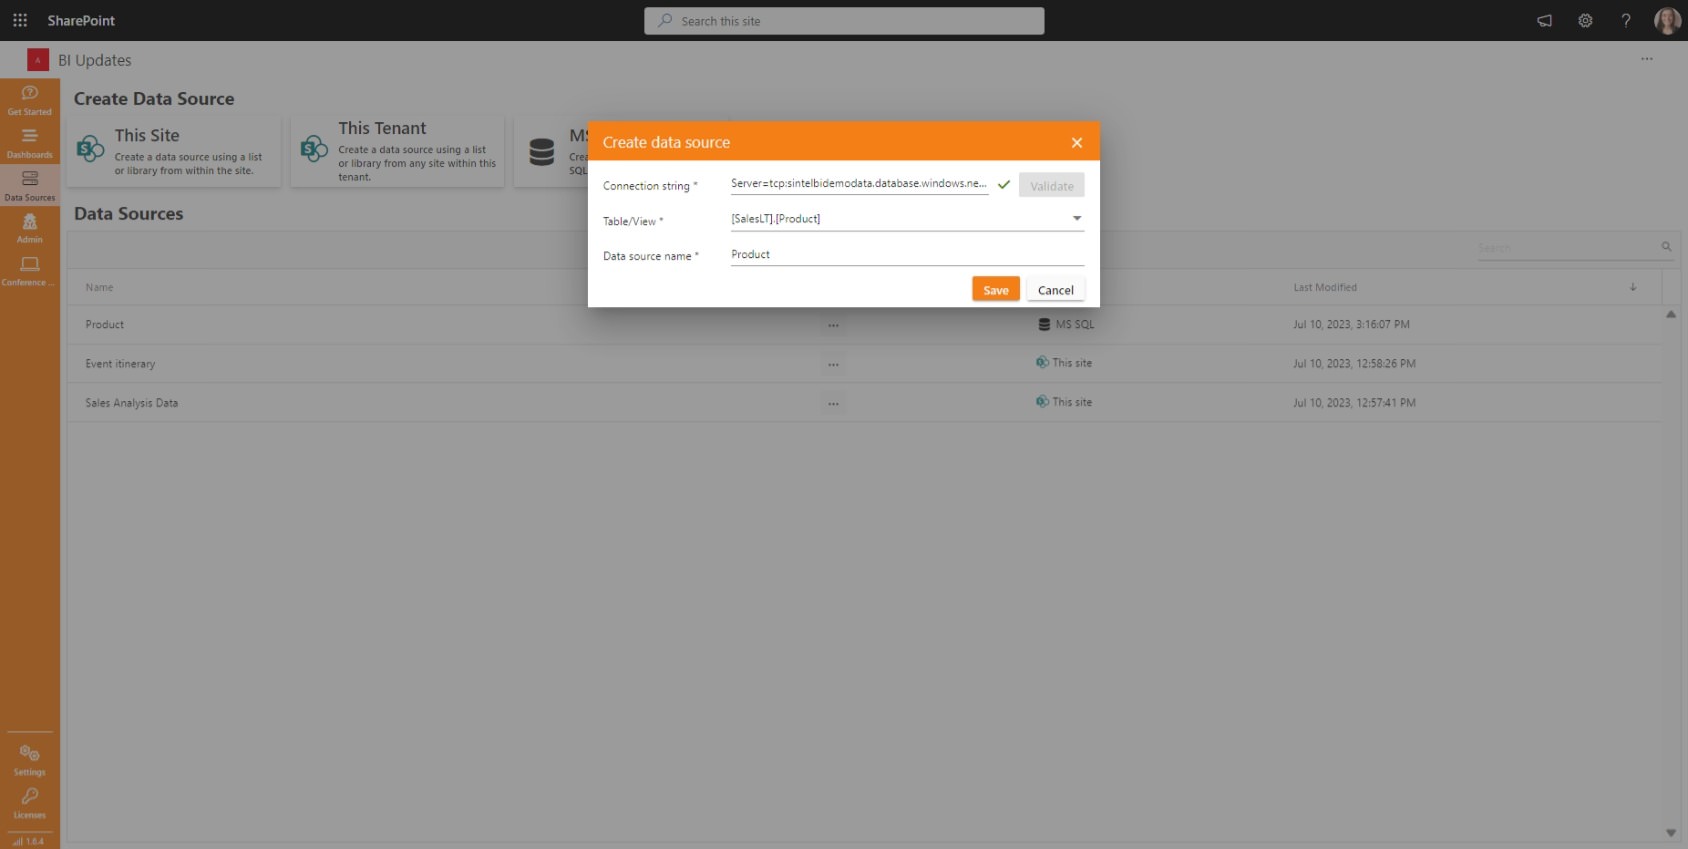
- Paste in the connection string and click validate.
An MS SQL connection string is a configuration setting that contains the necessary information for an application to establish a connection with a Microsoft SQL Server database. It typically includes details such as the server name, database name, authentication credentials, and additional parameters. You can find the connection string in the application’s configuration files, such as the web.config or app.config file, or it may be provided by the administrator or developer who set up the database connection.Sample connection string to test this feature: Server=tcp:sintelbidemodata.database.windows.net,1433;Initial Catalog=SintelBIDemoData;Persist Security Info=False;User ID=sintelBI;Password=na576ayUKsuLCuflE4fP;MultipleActiveResultSets=False;Encrypt=True;TrustServerCertificate=False;Connection Timeout=30;
- Select the table/View
- Give the data source a nameSome SQL servers may require you to add allow an IP address in order for your data to connect. The IP address for Sintel BI is: 20.229.106.231
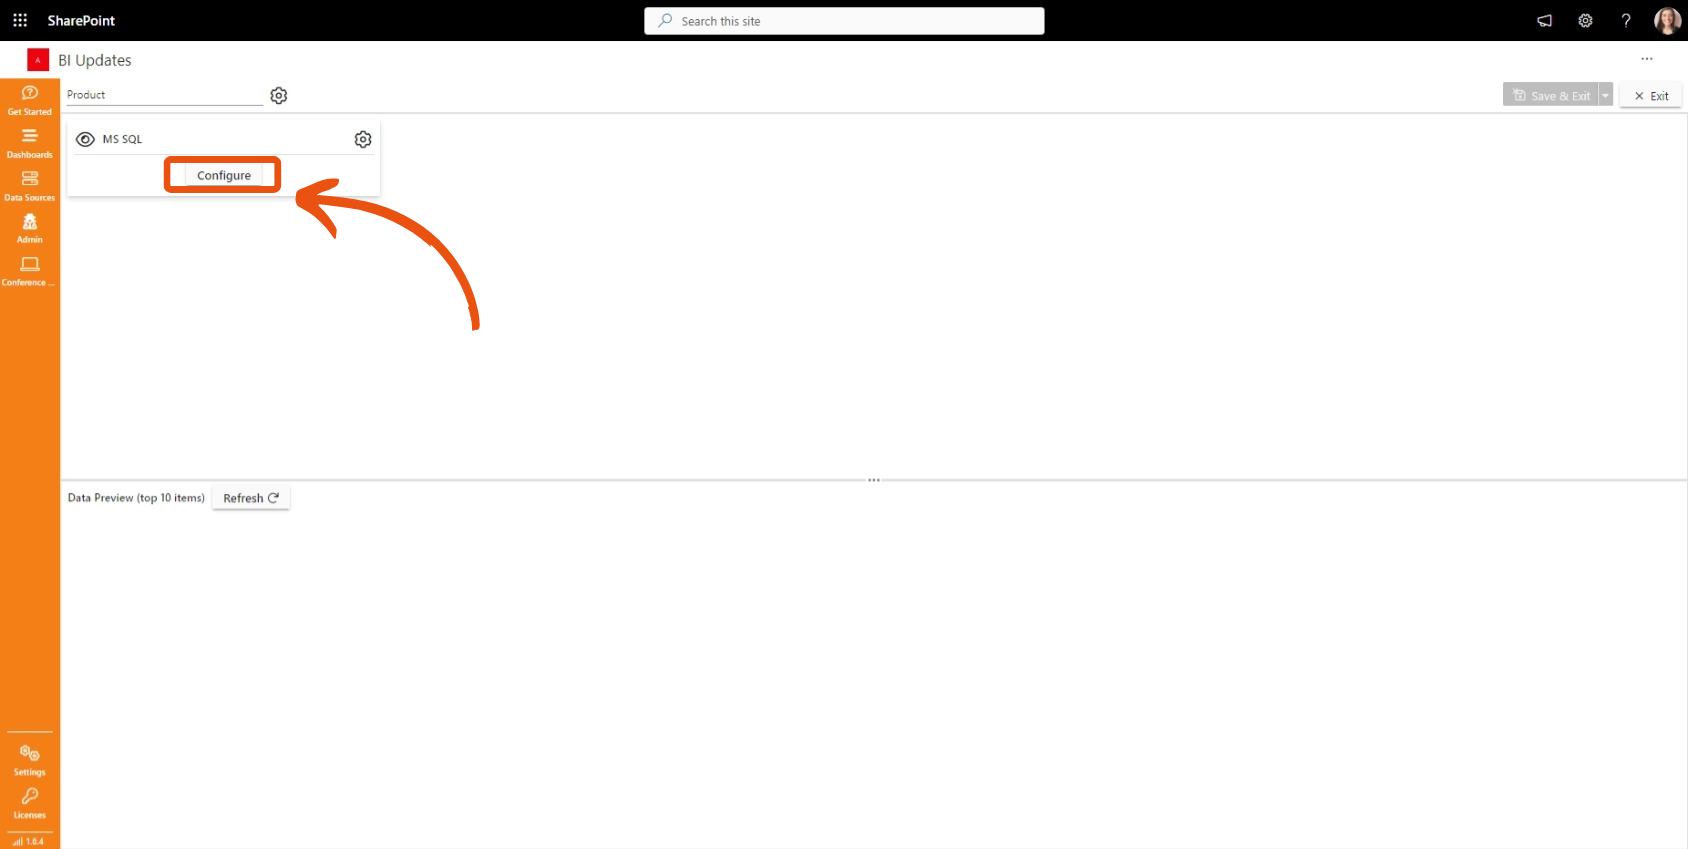
Sintel BI does not to import MS SQL data by default due to a number of factors such as performance optimisation, data quality considerations, access control, and the ability to selectively import relevant data based on user needs.
Therefore, the next thing you need to do once you have added the data source is select it and select configure.
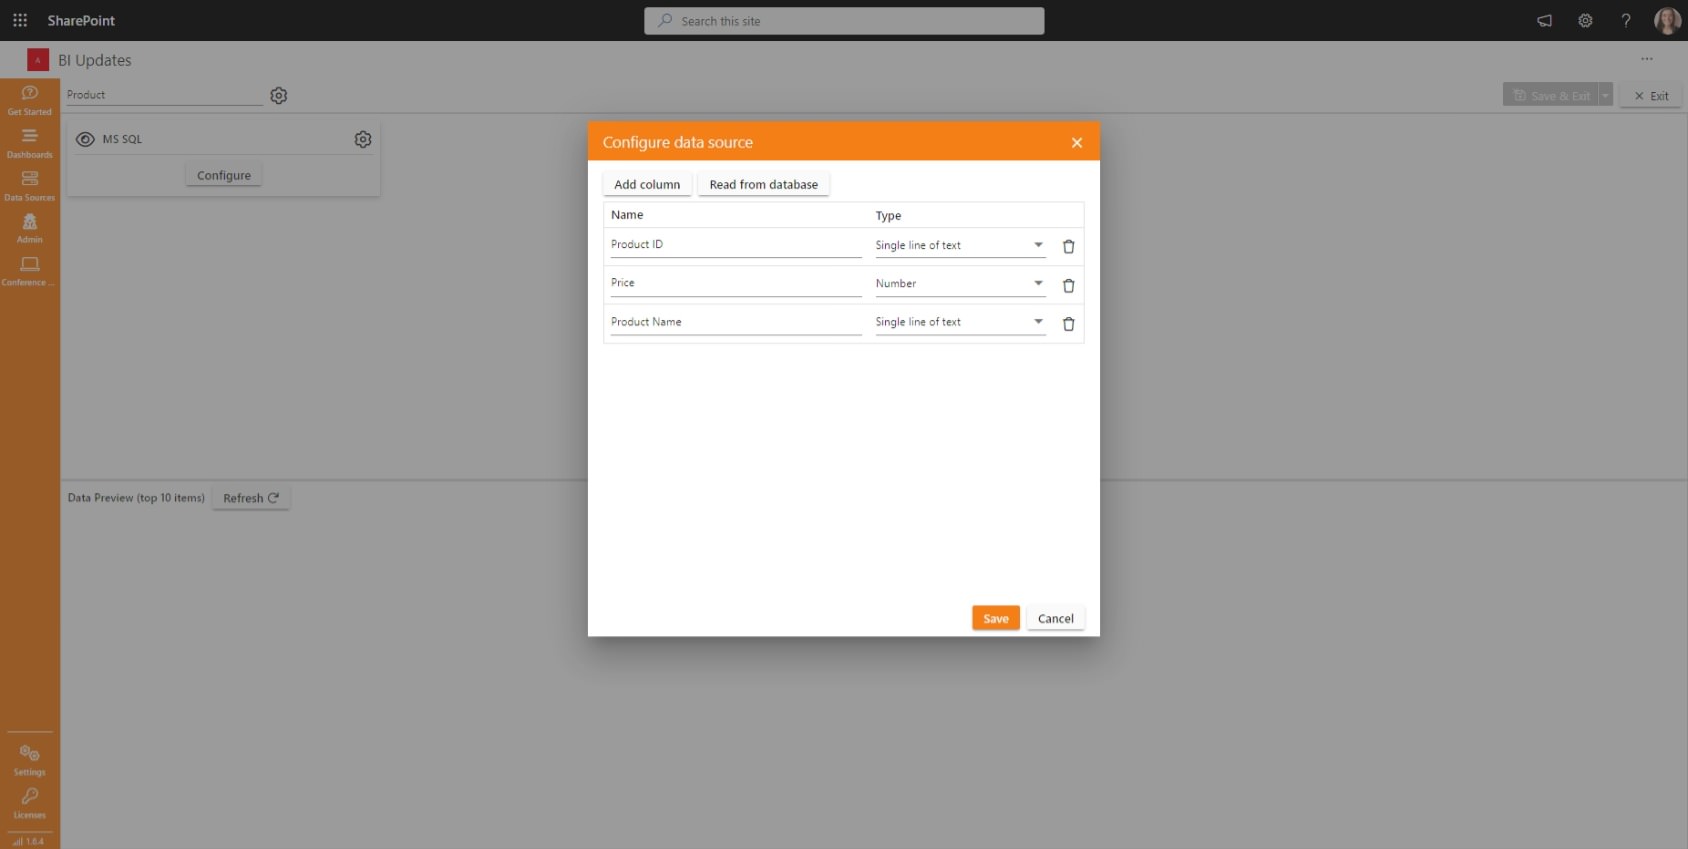
Here there are 2 buttons: Add column and Read from data base
Add column
The “Add from column” button allows users to add new columns to a data set. This approach offers flexibility in data modeling, enabling users to curate and shape the data according to their specific reporting or analysis requirements. It allows for customisation and tailoring of the data set to suit different visualization and analysis needs.
If you choose Add Column: You will add the name of the column and the column type.
The options for column type are: Single line of text, Multiple Lines of text, Yes/No, Number and Date/Time
Once you have added each of your columns click save.
Read from Database
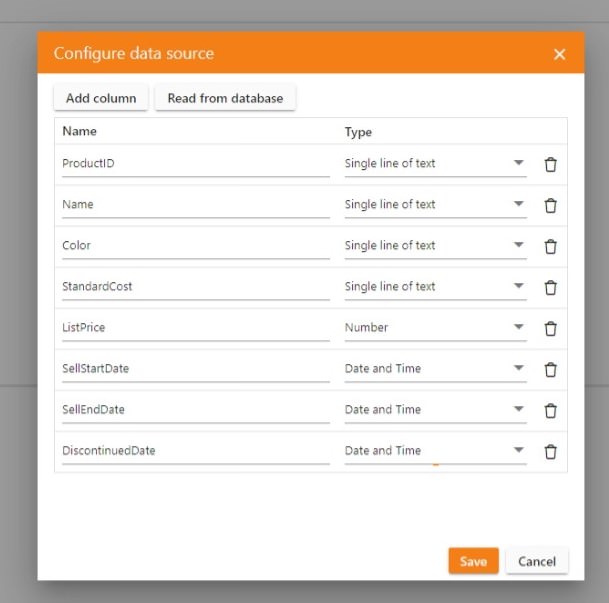
If you select Read from Database, it will pull in all columns from MS SQL.
You will then have to go through each column and assign it a Data Type or delete it, depending on its relevance.
Data Source Properties
Once you have added a data source there are a number of options available to you including:
- Editing
- Cloning
- Viewing source data
- Activating/Deactivating
- Deleting
Editing
You can make numerous changes to a data source including:
- Renaming a data source
- Select the current title
- Rename it
- Click Save

Renaming a Data Source
- Showing and hiding fields
- Navigate to the data source
- Select the three dots … and click edit
- By default, all fields are shown you can click the eye icon to hide any fields you do not want to show.
- Lastly, click Save & Exit
Showing and hiding Fields
- Changing field order
- Navigate to the data source
- Select the three dots … and click edit
- Drag & Drop the fields in the order you wish them to appear
- Lastly, click Save & Exit
Changing field order
- Renaming fields
- Navigate to the data source
- Select the three dots ‘…’ and click edit
- Click on the three dots ‘…’ beside the field name
- Select Rename
- Change the fields name
- Click OK

Renaming Field-Note that a pencil icon highlights that a field has been renamed
- Preview data
- Navigate to the data source you want to preview
- Select the three dots ‘…’ and click edit
- Select Refresh
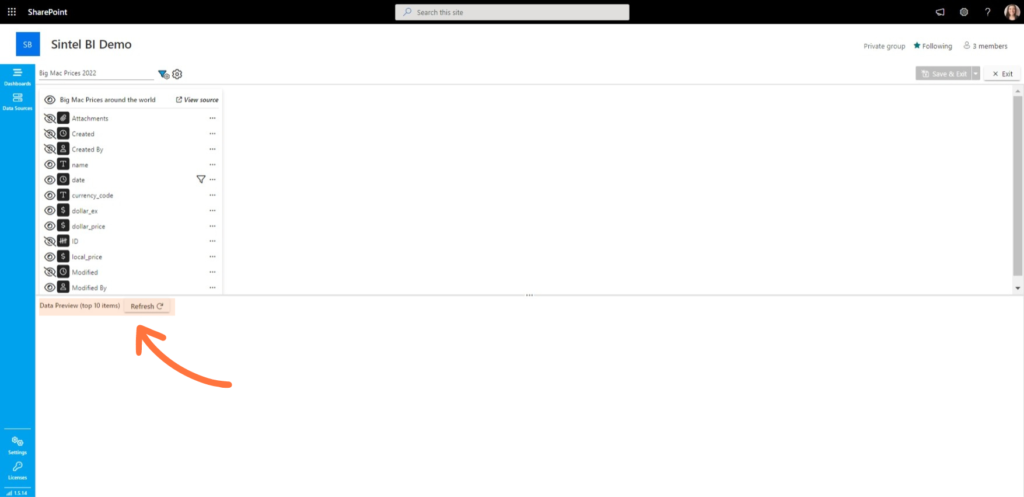
Preview Data
Other things to note:
The different icons displayed represent the different field types Number, User, Text, Date, Choice, and Attachments.
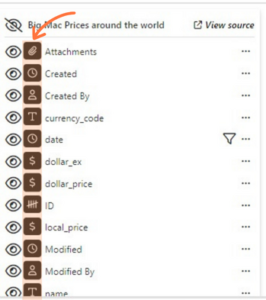
The icons represent different field types
Cloning
It is incredibly simple to clone your Data Source. This can be helpful when you need to duplicate similar data sources for different regions or departments.
To clone a data source:
- Navigate to the data source you wish to clone
- Click on the three dots …
- Select Clone
By default, the data source name will inherit the source components name, appended with the word ‘Copy’. We recommend that you change it to a name that suits you.
Activating / Deactivating
When you deactivate a data source, it will no longer send data to your Sintel BI dashboards.
To deactivate a data source:
- Navigate to the data source you wish to deactivate
- Click on the three dots … →
- Select Deactivate
If you wish to activate a data source after deactivating:
- Navigate to the data source you wish to activate
- Click on the three dots …
- Select Activate
Deleting a data source
Sometimes you no longer have use for a data source and there is no point in having it cluttering up your screen.
To delete a data source:
- Navigate to the data source you wish to delete
- Click on the three dots …
- Select Delete
Important notes
1) When connecting to SQL, is it direct or through a gateway?
Connections to your SQL databases are established server-side by Sintel BI’s backend, not from the user’s browser. We use a controlled gateway with a single static egress IP address, so you can allowlist one IP on your firewall. This ensures database credentials never leave the backend and are not exposed in the browser.
2) Is anything stored in the browser that could be a security issue?
No database credentials or connection strings are stored in the browser. Users provide the connection string only once during data source creation; it is stored securely on the backend and cannot be retrieved via the UI. The browser only holds standard session information required for application use.
3) Does the connection go through Sintel BI, different data centres, or direct from the browser?
All database traffic originates from the Sintel BI backend (the single allowlistable IP mentioned above). There is no direct browser-to-database connectivity.
4) If it’s a SQL endpoint, can it connect to lakehouses, data warehouses, or Databricks?
Currently, Sintel BI supports connections to traditional SQL Server–compatible databases using SQL authentication.
Platforms such as Microsoft Fabric Lakehouse/Warehouse, Azure Synapse, and Databricks require Microsoft Entra ID (AAD) or token-based authentication, which we do not support at this time. This may be added in a future update.