Search for answers or browse articles about Sintel Apps
Logic Tab: Create your First Rule (Overview)
The Logic tab in the Sintel Apps Designer allows you to control how a form behaves while a user is interacting with it.
Logic makes forms dynamic. It enables you to:
Show or hide fields, sections and tabs
Make fields required or optional
Display validation errors
Control workflow actions
Control custom button visibility
Enforce attachment or related list requirements
Execute custom JavaScript
For example: A section can appear immediately after a choice is selected. or Approval buttons that appear when status changes.
How Logic Works
Logic is built using rules. Each rule contains three parts:
- Conditions – When should the rule apply?
- Steps when conditions are met – What should happen if the condition is true?
- Steps when conditions are not met – What should happen if the condition is false?
Each rule runs independently. Multiple rules can apply to the same field or section.
Create your first Rule
Step 1: Open the Logic Tab
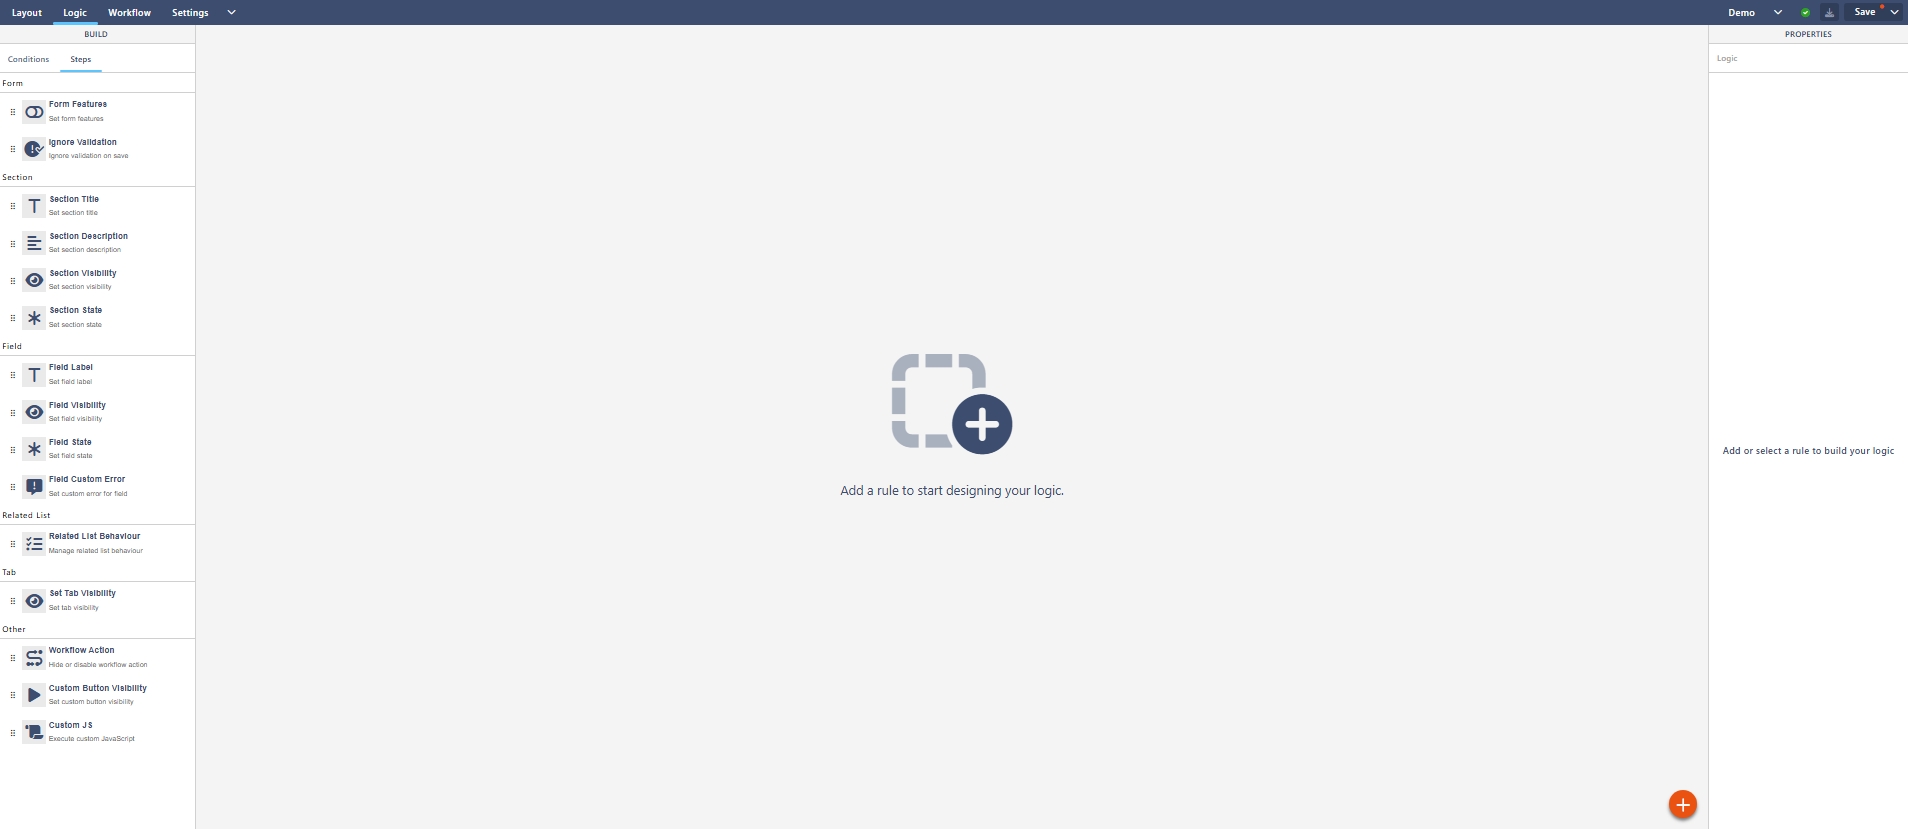
- Open your form in the Sintel Apps Designer.
- Select Logic from the top menu (Layout | Logic | Workflow | Settings).
You’ll see:
- A left panel with Conditions and Steps
- A large blank area prompting you to add a rule
- A right panel called Properties
Step 2: Add your rule
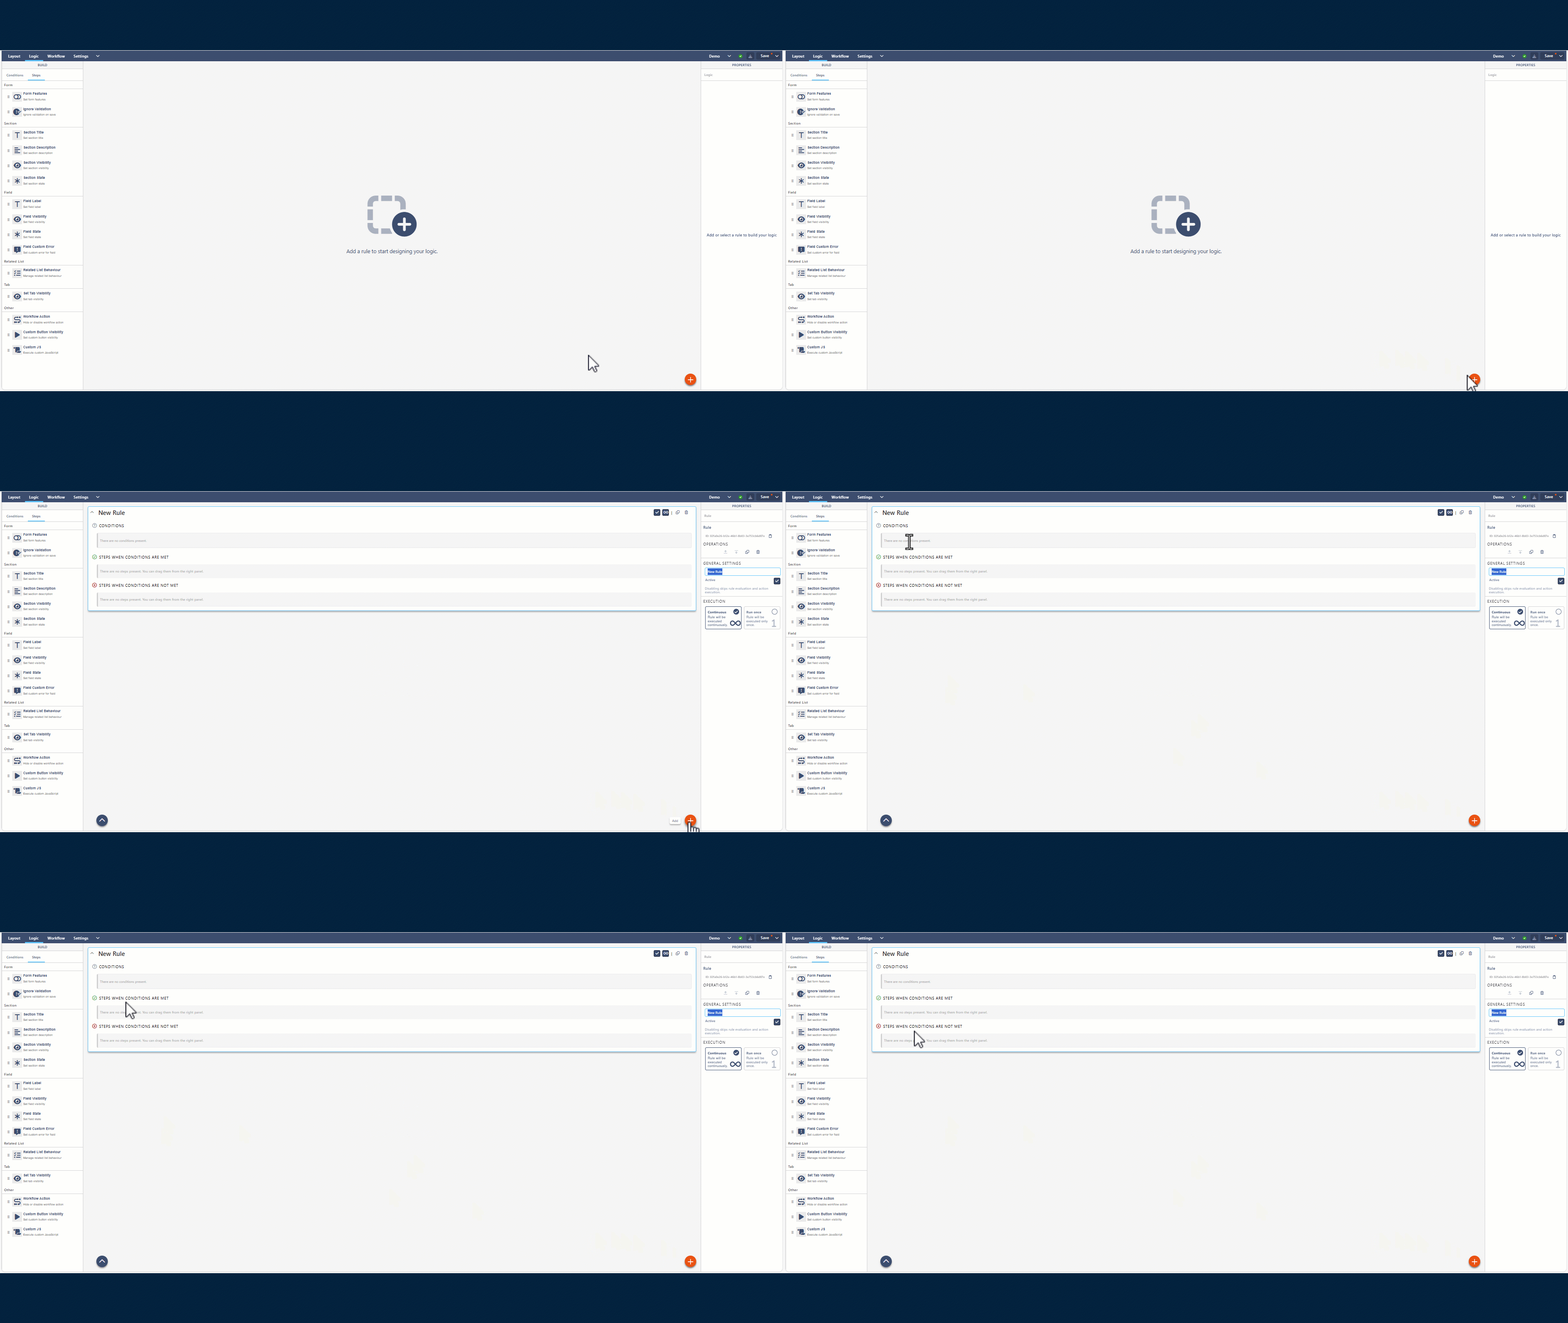
- Click the plus (+) button in the centre area (or “Add rule”).
- A new rule panel opens (often titled New Rule).
You will now see three sections:
- Conditions
- Steps when conditions are met
- Steps when conditions are not met
On the right, the Properties panel shows rule settings such as rule name and execution behaviour.
Step 3: Name the Rule
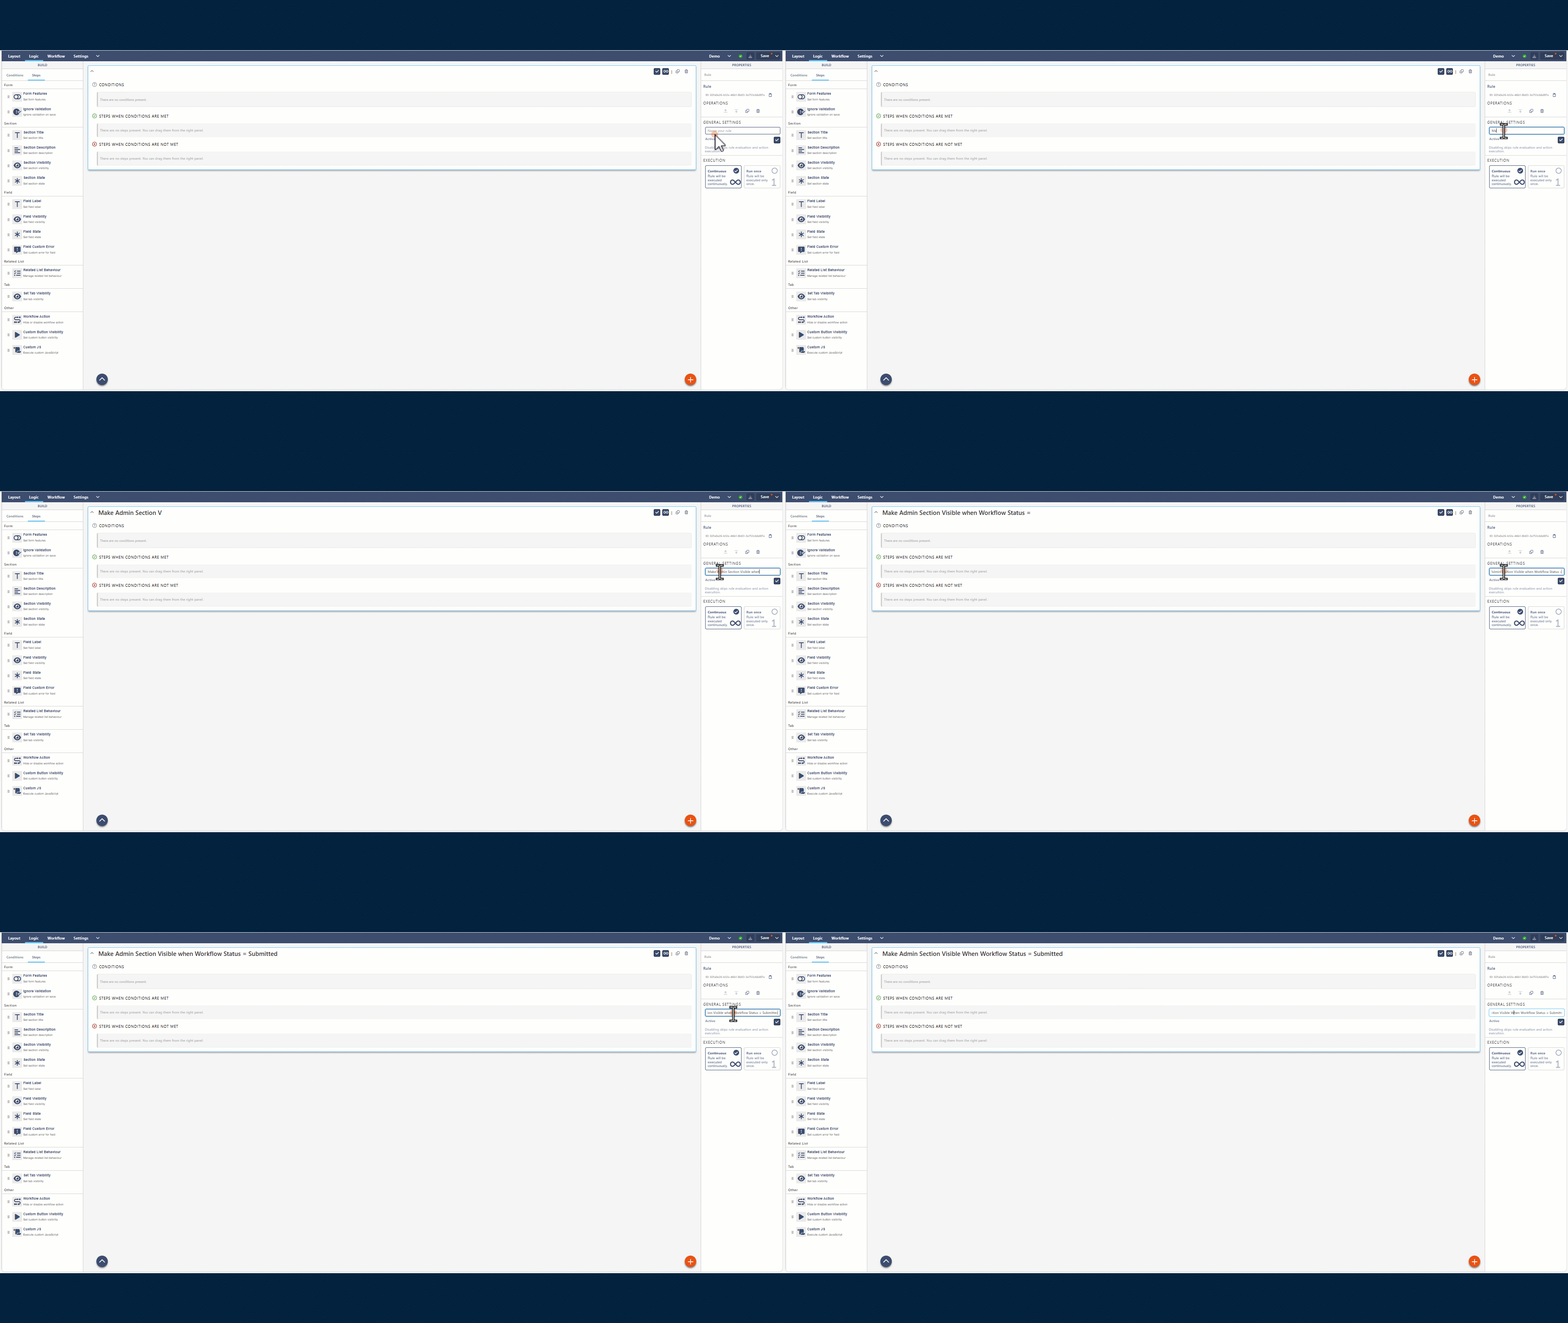
In the right-hand Properties panel, give the rule a clear name.
Use a consistent naming style like:
- Show Project Details when Request Type = Project
- Make Cost Code required when Department = Finance
- Hide Approval Section unless Status = Submitted
Good names make future maintenance much easier.
Step 4: Add a Condition
In the left panel, ensure Conditions is selected.
You’ll typically see condition types such as:
- Field value check
- Form mode (New, Edit, View)
- Author
- Group membership
- Workflow status
- Related list item count
- External user
- Attachment count
- Custom JS (advanced)
Step 5: Add Steps (Actions)
Now you define what happens.
In the left panel, select Steps.
Steps are grouped by area, for example:
Form
- Form features
- Ignore validation
Section
- Set section title
- Set section description
- Set section visibility
- Set section state
Field
- Set field label
- Set field visibility
- Set field state
- Set custom error for field
Related list – Related list behaviour
Tab – Set tab visibility
Other
- Workflow action
- Custom button visibility
- Custom JS
Step 6: Drag Steps Into “When Conditions Are Met”
- Drag the required step into Steps when conditions are met.
- Configure it once it lands in the step area.
Common Example: Show/Hide a Field
- Drag Set field visibility
- Choose the field
- Set to Visible (when met)
Then add the opposite step in the “not met” section.
Step 7: Add Steps Into “When Conditions Are Not Met”
This is the “otherwise” behaviour.
Example:
- Drag Set field visibility
- Choose the same field
- Set to Hidden (when not met)
This avoids scenarios where a field stays visible because a user changed an earlier answer.
Step 8: Choose Rule Execution Behaviour
On the right-hand Properties panel you’ll typically see execution options such as:
- Continuous (runs as the user interacts with the form)
- Run once (runs a single time)
Recommended
- Use Continuous for visibility/required-field logic.
- Use Run once only when you are setting values or doing something that shouldn’t re-trigger repeatedly.
Step 9: Save and Test
- Select Save
- Open the form and test:
What’s Next?➡️ Next article: Sintel Apps Designer – Workflow Tab (Overview)
We’ll build a basic workflow with statuses and actions, then cover audiences, quorum, and notifications.