Search for answers or browse articles about Sintel Apps
HTML Widget
The HTML widget allows you to add formatted content, instructions, or custom layout elements directly into your form. It does not store data in the underlying SharePoint list.
What Is the HTML Widget?
The HTML widget provides a rich text editor where you can add:
- Formatted text
- Headings
- Lists
- Links
- Images
- Tables
- Structured content
It is commonly used for:
- Form instructions
- Compliance statements
- Policy references
- Visual separators
- Branded headers
- Custom layout elements
Unlike standard fields, the HTML widget is for display purposes only.
Furthermore, this widget empowers you to input HTML and tokens for embedding form field values.
Supported field types include:
- Choice
- MultiChoice
- Lookup
- Currency
- Number
- Text
- Multiline text
- Boolean
To add one of these field types, simply type “{{” and a list of available tokens will appear. When you add “{{field_name}},” this token will be replaced with a value from the field.
How to Add the HTML Widget
- Open the Layout tab in the Designer.
- Select Widgets in the left panel.
- Drag and drop HTML onto your form.
- Enter content using the rich text editor.
The widget will display the formatted content directly within the form. The HTML widget includes a full rich text editor with standard formatting tools or you can switch to Code View.
Example Ideas for Using HTML
You can use the HTML widget to create:
Branded Section Headers
Custom coloured headers with icons.

<div style="padding:12px 15px; background:#2F80ED; color:#ffffff; border-radius:4px;"> <h3 style="margin:0;"><i class="fas fa-folder-open" style="margin-right:8px;"></i> Project Details </h3> </div>
Information Panels
Highlight important instructions or warnings.

<div style="padding:15px; background:#f4f6f9; border-left:4px solid #2F80ED;">
   <h3>Important Notice</h3>
   <p>Please ensure all required documents are uploaded before submission.</p>
</div>
Policy Acknowledgement Text
Display formatted compliance statements.

<div style="padding:10px; background:#f8f9fa; border:1px solid #dee2e6;">
   <p>
      <i class="fas fa-shield-alt" style="margin-right:6px;"></i>
      By submitting this form, you confirm that all information provided
      complies with organisational policy.
   </p>
</div>
Visual Separators
Create spacing or horizontal rule sections between groups of fields.
Simple divider:

<hr style="border:0; height:1px; background:#e0e0e0; margin:20px 0;"/>
Divider with icon:

<div style="text-align:center; margin:20px 0; color:#6c757d;">
   <i class="fas fa-ellipsis-h"></i>
</div>
Embedded Links
Provide quick access to policies or external systems.

<p>
   <i class="fas fa-external-link-alt" style="margin-right:6px;"></i>
   <a href="https://yourorganisation.com/policy" target="_blank">
      View Full Policy
   </a>
</p>
HTML with tokens
Improve user experience even more by including tokens in your HTML
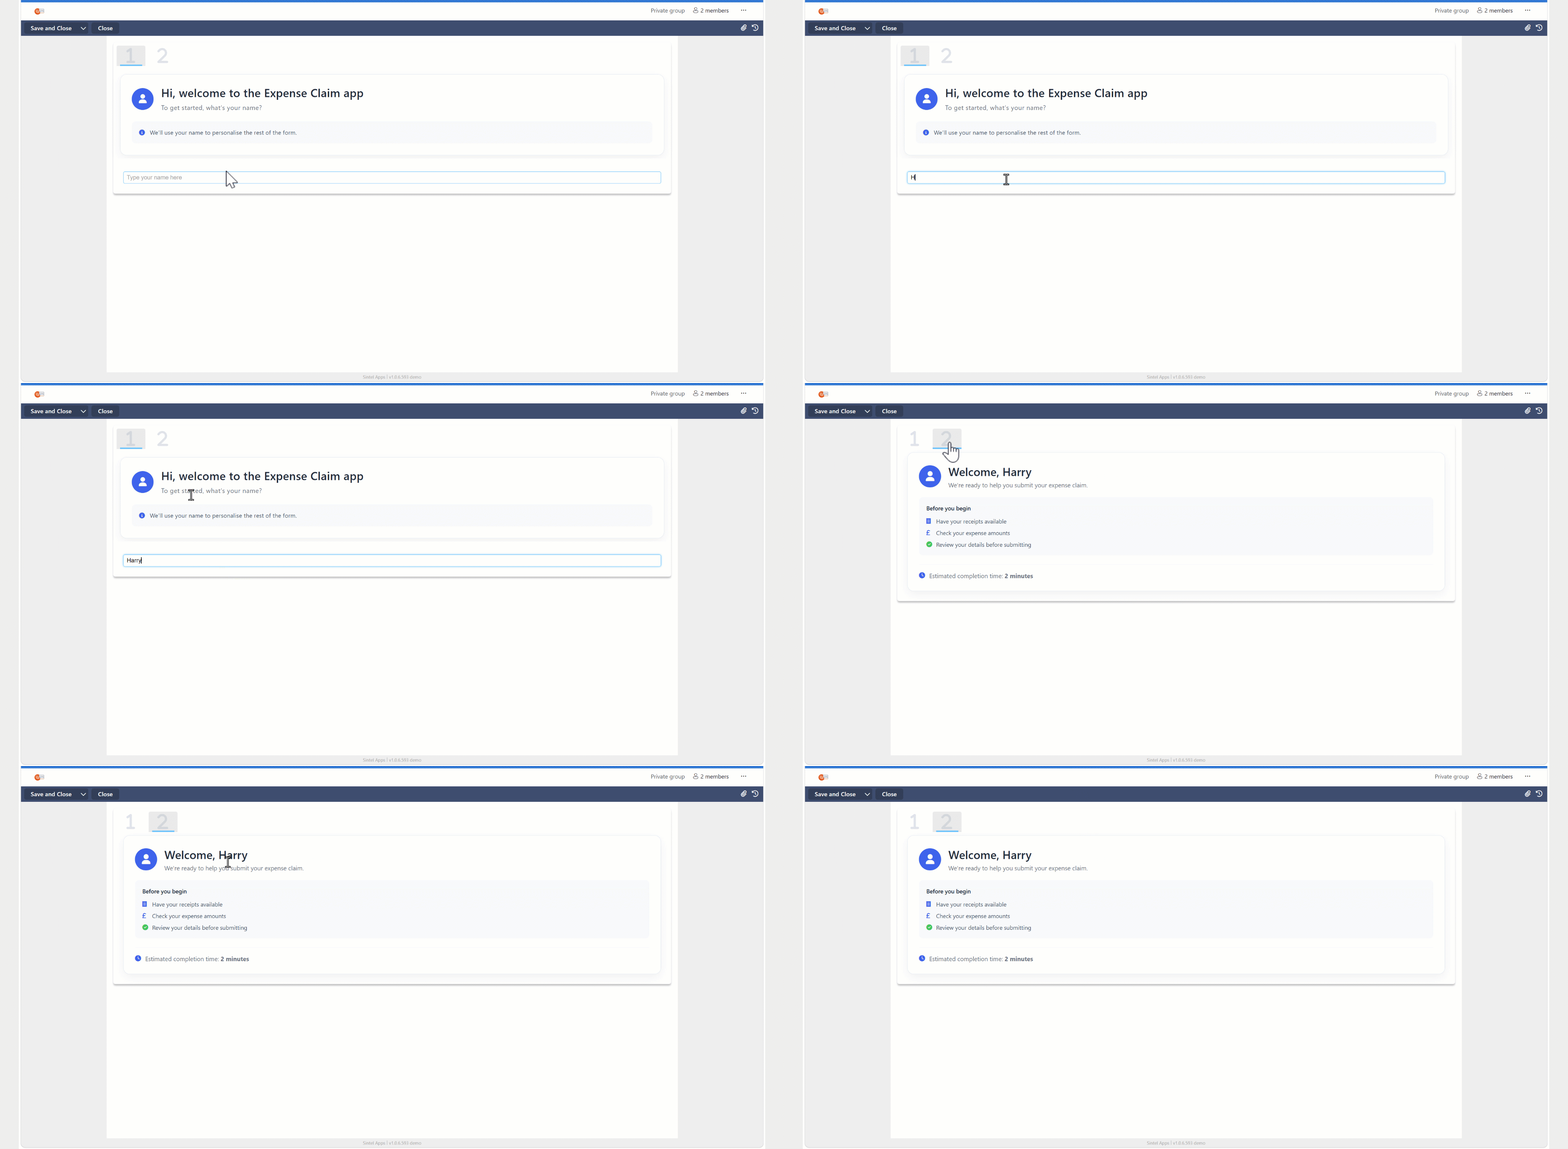
<div style="
background:#ffffff;
border:1px solid #e1e7ef;
border-radius:16px;
padding:28px;
font-family:'Segoe UI',Arial,sans-serif;
box-shadow:0 8px 24px rgba(0,0,0,.06);
">
<div style="display:flex;align-items:center;">
<div style="
width:54px;
height:54px;
background:#2563eb;
border-radius:50%;
display:flex;
align-items:center;
justify-content:center;
color:#ffffff;
font-size:22px;
flex-shrink:0;
"><i class="fa-solid fa-user"></i></div>
<div style="margin-left:18px;">
<div style="
font-size:28px;
font-weight:600;
color:#1f2937;
line-height:1.2;
"> Hi, welcome to the Expense Claim app </div>
<div style="
color:#6b7280;
font-size:16px;
margin-top:8px;
line-height:1.5;
"> To get started, what’s your name? </div>
</div>
</div>
<div style="
margin-top:22px;
padding:16px 18px;
background:#f8fafc;
border-radius:10px;
color:#475569;
font-size:14px;
line-height:1.6;
"><i class="fa-solid fa-circle-info" style="color:#2563eb;margin-right:8px;"></i> We’ll use your name to personalise the rest of the form. </div>
</div><div style="background:#ffffff;border:1px solid #e1e7ef;border-radius:16px;padding:28px;font-family:'Segoe UI',Arial,sans-serif;box-shadow:0 8px 24px rgba(0,0,0,.06);">
<div style="display:flex;align-items:center;margin-bottom:20px;">
<div style="width:54px;height:54px;background:#2563eb;border-radius:50%;display:flex;align-items:center;justify-content:center;font-size:24px;color:white;"><i class="fas fa-user"></i></div>
<div style="margin-left:18px;">
<div style="font-size:28px;font-weight:600;color:#1f2937;"> Welcome, {{YourName}} </div>
<div style="color:#6b7280;font-size:15px;margin-top:4px;"> We're ready to help you submit your expense claim. </div>
</div>
</div>
<div style="background:#f8fafc;border-radius:10px;padding:18px;">
<div style="font-weight:600;margin-bottom:14px;color:#1f2937;"> Before you begin </div>
<div style="display:flex;align-items:center;margin-bottom:10px;color:#475569;"><i class="fas fa-receipt" style="width:24px;color:#2563eb;"></i><span>Have your receipts available</span></div>
<div style="display:flex;align-items:center;margin-bottom:10px;color:#475569;"><i class="fas fa-pound-sign" style="width:24px;color:#2563eb;"></i><span>Check your expense amounts</span></div>
<div style="display:flex;align-items:center;color:#475569;"><i class="fas fa-check-circle" style="width:24px;color:#22c55e;"></i><span>Review your details before submitting</span></div>
</div>
<div style="margin-top:22px;padding-top:16px;border-top:1px solid #edf2f7;color:#6b7280;font-size:15px;display:flex;align-items:center;"><i class="fas fa-clock" style="margin-right:10px;color:#2563eb;"></i><span>Estimated completion time: <strong>2 minutes</strong></span></div>
</div>
Tips
- Use HTML when you want layout flexibility beyond standard fields
- Do not try use HTML to collect data.
- Keep formatting consistent with your form theme.
- Avoid overcomplicating layout with unnecessary styling and keep instructional text concise.
- The HTML widget is display-only, it does not create a SharePoint column.