Search for answers or browse articles about Sintel Apps
Data Import/Export
Overview
Data Import/Export extends the existing export configuration to allow you to include the data stored in selected lists. You can move a form and its list items from one SharePoint site to another in a single .sintelforms package.
Typical uses:
- Moving a form from a test site to production together with its reference data, such as the values in lookup lists.
- Setting up a demo or training site with realistic sample items.
- Copying a small list of items between sites without scripts or third-party tools.
Data Import/Export is designed for reference and sample data, not for migrating large volumes of business records. See Limitations below before you start.
Before you start
- Licence: including list data in an export requires the Data Import/Export feature in your Sintel Apps licence. Without it, the Include list data option is locked.
- Permissions: to import, you need permission to create lists on the target site. Data is read and written with your own SharePoint permissions.
- Save first: an export only includes changes that have been saved in the Form Designer.
Exporting a form with data
- Open the form in the Form Designer.
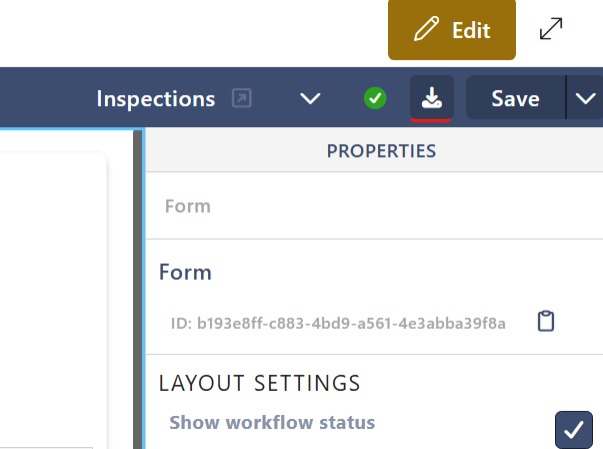
- Click the Export Configuration (download) icon in the top bar, next to Save.

Export button
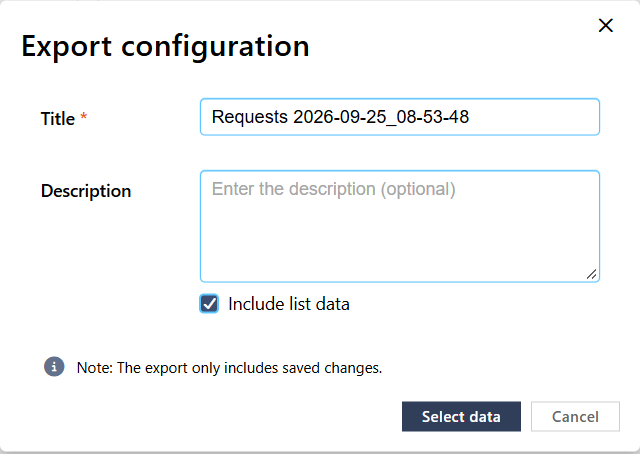
- Enter a Title for the package (a date-stamped title is suggested) and, optionally, a Description.
- Tick Include list data. The button changes from Export to Select data. Click it.

Export configuration with Include list data ticked
- In Configure exported data, tick each list whose items you want to include. The number on the right of each list is its current item count.
- Click Export. The .sintelforms package is created and downloaded to your computer. Stay on the page until it completes.
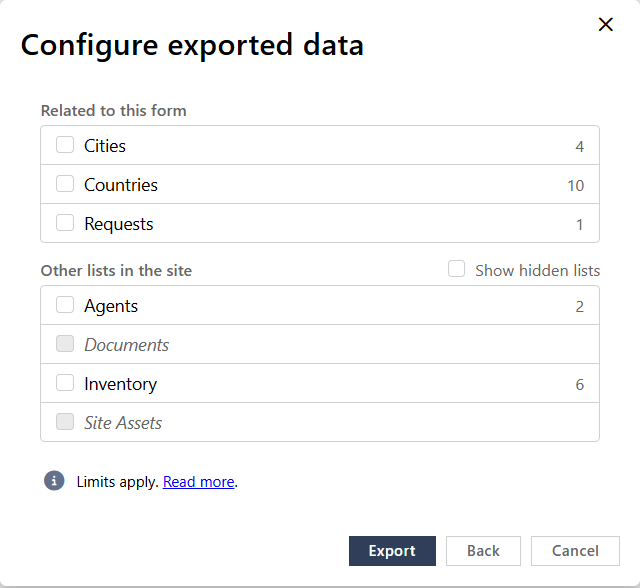
Configure exported data: lists related to the form and other lists in the site
Choosing which lists to export
The dialog groups the lists into two sections:
- Related to this form: the form’s main list plus the lists it depends on, such as lookup and related lists. Their schema and configuration are always part of the package. Here you only decide whether their items are included.
- Other lists in the site: any other list on the site, even if the form doesn’t use it. When you tick one of these lists, its schema, views and items are added to the package, so the list is recreated on the target site during import. If the list also has its own Sintel Apps form configuration, that configuration is included in the package too.
- Tick Show hidden lists to include lists that are hidden in SharePoint.
- Document libraries (e.g. Documents, Site Assets) are shown greyed out: files can’t be exported.
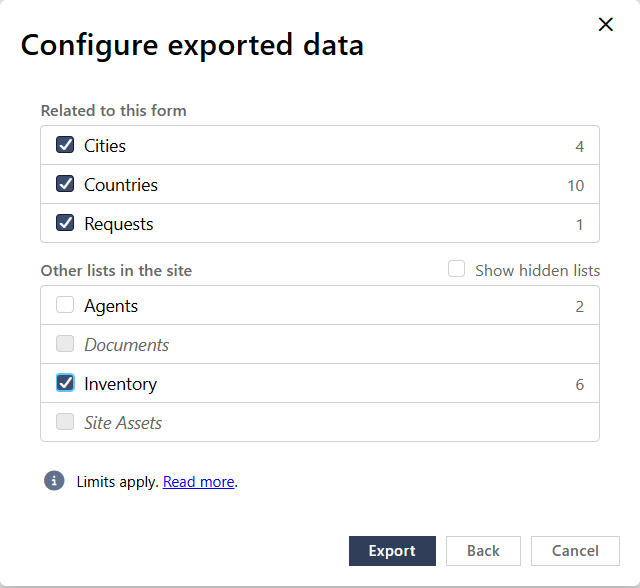
The form’s lists plus the unrelated Inventory list selected for export
Nothing is exported for a list you leave unticked, apart from its configuration if the form needs it. You can therefore export the form’s structure with only its lookup lists’ data, and leave out the transactional items in the main list.
Importing a package with data
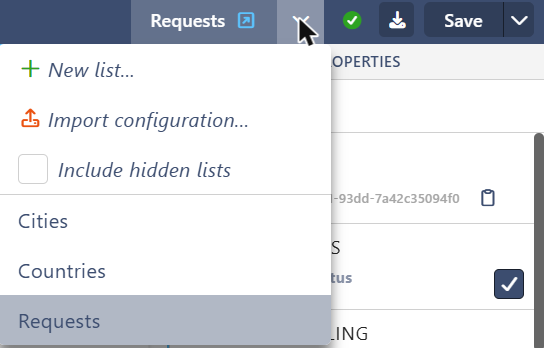
- In the Form Designer on the target site, open the list selector drop-down in the top bar and choose Import configuration…

Import configuration… in the list selector menu
- Click Select (or drag the file onto the drop zone) and choose the .sintelforms package.
- Read the notice about what the import does not include (see Limitations), then click Proceed.
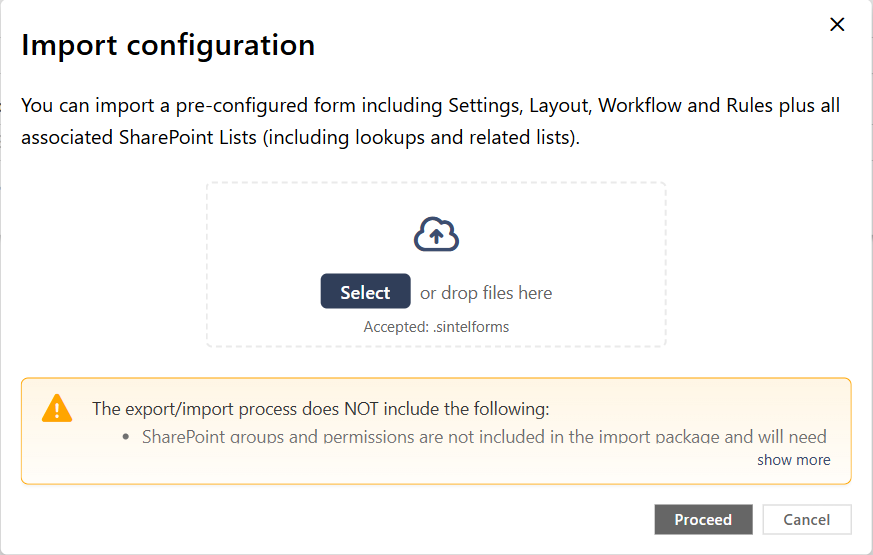
Import configuration: selecting the package
4. The Import Configuration summary lists every list in the package and what it contains.
5. In the Data column, tick the lists whose items you want to import (the checkbox in the column header toggles all of them). The number of items in the package is shown under each checkbox. A disabled checkbox means the package has no data for that list.
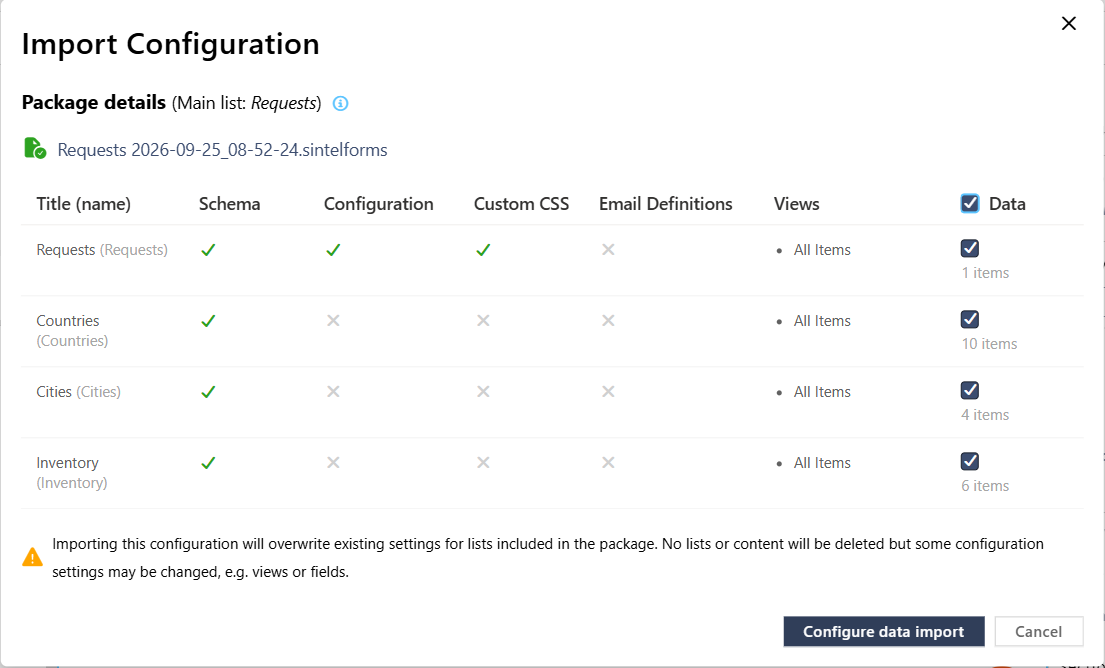
Package summary with data selected for all four lists
6. The main button changes from Import to Configure data import. Click it to choose how items are matched (see next section), then click Import.
The form configuration is imported first, then the list data is imported in the background. A message confirms that “Data import is running in the background. You can continue working while the import completes.” Refresh the lists after a moment to see the imported items.
If you leave all Data checkboxes unticked, the package is imported exactly as before: configuration and schema only, and no items are added.
Configure Data Import: matching existing items
For every list that already exists on the target site (matched by the list’s internal name), you decide how imported items relate to items already in the list:
- Match by: the column used to recognise an item that already exists. The package value is compared with the existing value. Title is selected by default where it exists. Only columns of supported types that can be edited are offered.
- If a match is found: what to do when an existing item has the same value in that column.
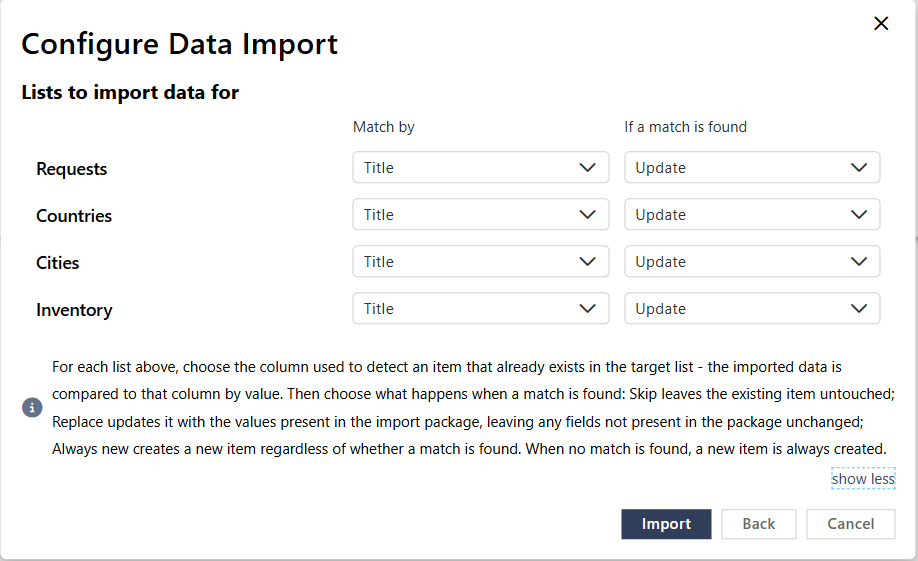
Configure Data Import: match column and strategy per list
Lists that don’t exist yet on the target site are created, and all items in the package are added as new items. No matching options are shown for these lists.
For existing lists, if no match is found, a new item is created. If a match is found, choose what happens to the existing item:
- Update (default)
Updates the existing item with the values in the package. Columns that aren’t in the package are left unchanged. An empty value clears the column unless the column is required. - Skip
Leaves the existing item unchanged. - Always new
Ignores matching and creates a new item instead, even when a matching item already exists.
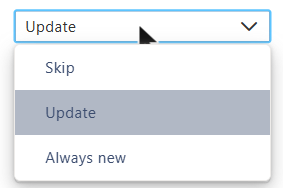
If a match is found options
Always new creates duplicates if you run the same import twice, or if the target list already contains the same items. Use Update or Skip when importing into lists that already hold data.
Matching details:
- Values are compared exactly, after trimming leading and trailing spaces. Empty values never match.
- If several existing items have the same value, the first one is used.
- Choose a column whose values are unique, such as a code or reference number, for reliable matching.
- The import never deletes items or lists.
If an individual item can’t be imported
Items are imported one at a time. If SharePoint rejects a particular item, for example because a Number column has minimum and maximum values set and the item’s value falls outside them, that item is skipped and the import continues with the next one. One problem item doesn’t stop the rest of the list from being imported.
This is most likely to happen when the target list’s column settings differ from the source list, such as validation rules or required columns that were added later. If some items are missing after an import, compare their values with the target list’s column settings, correct either side, and run the import again. Using Skip or Update avoids duplicating the items that were already imported.
Limitations
Item limits
- At most 200 items per list are exported. For larger lists, only the first 200 items, by ID, are included. A warning icon in the export dialog tells you when a list will be cut short, and the import summary shows the same warning when a list in the package is incomplete.
- At most 1,000 items in total per export, counting up to 200 per list. If your selection exceeds this, the Export button is disabled until you deselect some lists.
Supported column types
List items can be exported and imported, but the values they contain are only carried over for supported SharePoint column types.
Supported: Single line of text; Multiple lines of text; Number; Currency; Date and Time; Yes/No; Choice (single and multiple)
Not supported: Lookup; Person or Group; Managed Metadata; Hyperlink or Picture; Calculated; attachments; files in document libraries
Columns of unsupported types are still created on the target list as part of the list’s schema, but their values are not populated on imported items.
Note: A Lookup column is different from a lookup list. Items in a lookup list can be exported and imported, but values in a Lookup column are not carried over and must be filled in again after import.
What is not carried over
- Item IDs: imported items get new IDs on the target list.
- System columns: Created, Modified, Created By and Modified By are set by SharePoint at import time, so the original values are lost.
- Hidden columns, version history, workflow history and comments of items.
- SharePoint groups and permissions, group restrictions on People columns and Content Types. These must be set up separately on the target site, as noted in the import dialog.
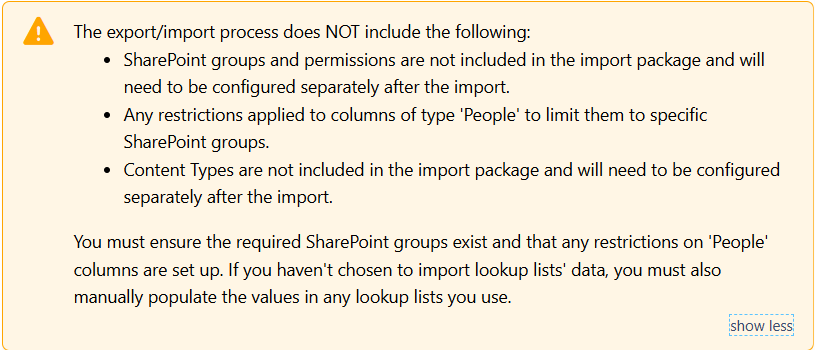
The import dialog’s notice about what is not included
Other things to know
- Document libraries can’t be selected for data export.
- Lists are matched to existing lists by their internal name, not by their display title.
- Importing a package overwrites the configuration of the lists it contains, e.g. views or fields. Lists and items are never deleted.
- The data import runs in the background, and the app doesn’t show a progress indicator or a completion message. If you’re importing into existing lists, check the results once the import has finished.
- Items that SharePoint rejects, for example because of column validation, are skipped. The rest of the import carries on (see If an individual item can’t be imported).
Related articles:
Importing and exporting form configuration