Search for answers or browse articles about Sintel Apps
Workflow Tab (Overview)
This article explains how to use the Workflow tab in the Sintel Apps Designer to build structured business processes using statuses, actions, and approvals.
The Workflow tab controls how a form moves through a process, who can take actions, and what happens at each stage.
What the Workflow Tab Is For
Use the Workflow tab to:
- Define form statuses (e.g. New, Submitted, Approved)
- Create actions users can perform
- Control who can act at each stage
- Configure approvals, confirmations, and transitions
- Guide users through a clear business process
If your form does not require approvals or structured steps, workflow may not be needed.
Workflow Screen Overview
The Workflow tab is made up of:
- Centre canvas – Workflow design area
- Right panel – Properties and configuration
Workflow is built visually by adding statuses, then defining actions between them.
Step 1: Understand Statuses
A status represents the current state of a form.
Examples:
- New
- Draft
- Submitted
- Approved
- Rejected
- Completed
Every form starts in a status.
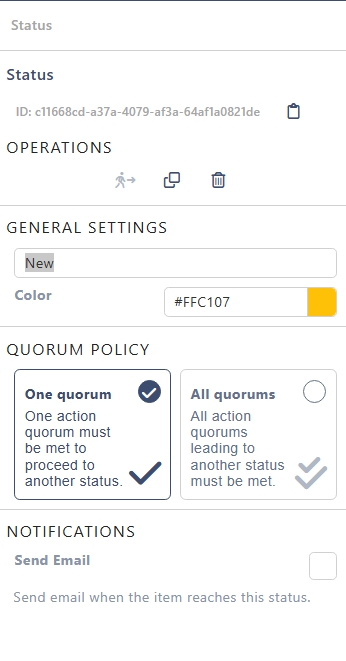
Step 2: Create or Edit a Status
- Click the orange + button to add a New Status
- Define your Status Properties
Status Properties Include:
- Status name
- Colour
- Status ID
- Quorums
- Notifications
Only one status can be marked as the initial status.
Step 3: Understand Actions
An action is something a user can do to move the form from one status to another.
Examples:
- Submit
- Approve
- Reject
- Send back
- Complete
Actions appear as buttons on the form.
Step 4: Create an Action
- Select a status on the canvas
- Choose Add action
- Configure the action properties
Step 5: Configure Action Properties
Each action has several important settings.
– Basic Settings
- Action name – Label shown to users
- Action type – Submit, Approve, Reject, etc.
- Target status – Status the form moves to
– Audience (Who Can See the Action)
Define who is allowed to perform the action:
- Specific users
- SharePoint groups
- Dynamic users (Created By, Manager, etc.)
If a user is not in the audience, they will not see the action button.
– Quorum (Optional)
Quorum is used when multiple people must approve an action.
Examples:
- All users must approve
- Any one user can approve
- A specific number of approvals is required
Quorum is typically used for approval steps.
– Confirmation
You can require confirmation before the action completes.
Options include:
- Confirmation message
- Additional comments
- Mandatory comments
This is useful for approvals and rejections.
Step 6: Notifications
Actions can trigger notifications.
You can:
- Notify the next approver
- Notify the form submitter
- Notify specific users or groups
Notifications help keep processes moving without manual follow-up.
Step 7: Repeat for Each Status
Continue building your workflow by:
- Adding statuses
- Creating actions between them
- Defining who can act at each stage
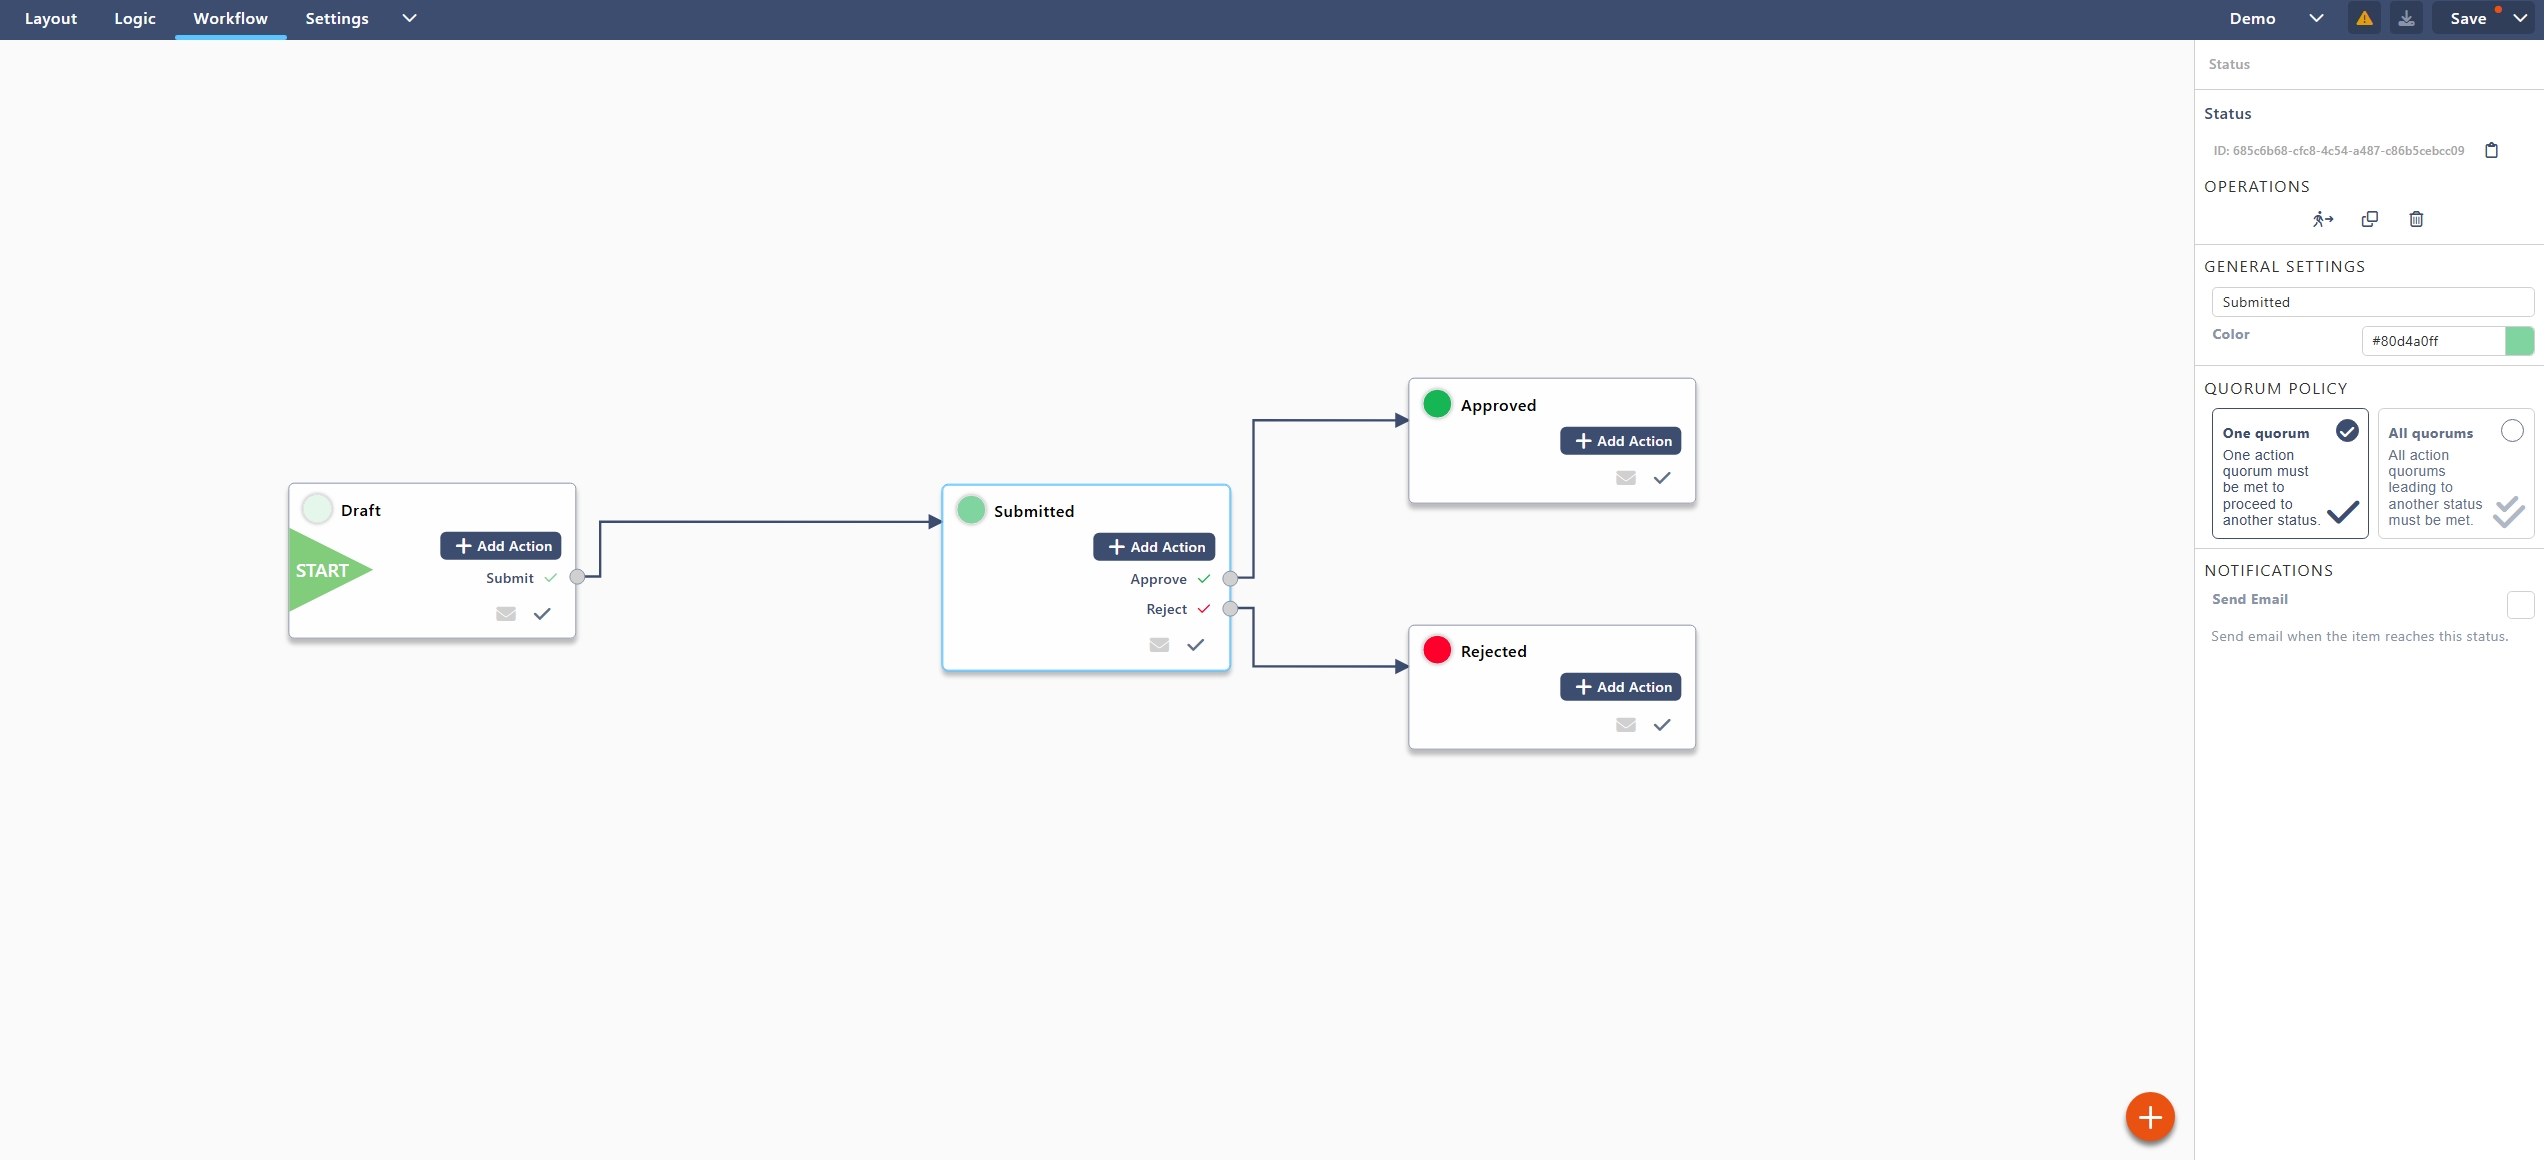
Example: Simple Approval Workflow
Scenario
A request must be submitted, reviewed, and either approved or rejected.
Statuses
- Draft (Initial)
- Submitted
- Approved (Final)
- Rejected
Actions
From Draft
- Submit
- Audience: Created By
- Target status: Submitted
From Submitted
- Approve
- Audience: Approver group
- Target status: Approved
- Reject
- Audience: Approver group
- Target status: Rejected
- Confirmation: Mandatory comment
Step 8: Workflow Visibility on the Form
To display workflow information to users:
- Add the Workflow Status widget (Layout tab)
- Add the Workflow History widget (optional)
This gives users visibility of:
- Current status
- Completed actions
- Who approved or rejected
Step 9: Save and Test the Workflow
- Select Save
- Test the form as:
- Submitter
- Approver
- Confirm:
- Actions appear correctly
- Status changes as expected
- Users only see actions they are allowed to perform
Common Workflow Mistakes to Avoid
- Forgetting to set an initial status
- Not defining a target status for an action
- Allowing too many users to see approval actions
- Missing rejection paths
- Not testing with real user permissions
Workflow Best Practices
- Keep workflows as simple as possible
- Use clear, action-oriented labels
- Always include a rejection or send-back option
- Match workflow steps to real business processes
- Combine workflow with logic for best results