Search for answers or browse articles about Sintel Apps
Workflow Actions – Configuration and Settings
This article explains how to configure Workflow Actions in Sintel Apps and what each action setting controls.
An action moves a form from one status to another.
What Is an Action?
An action:
-
Appears as a button on the form
-
Can only be seen by defined users
-
Moves the form to a target status
-
May require approval or confirmation
Examples include: Submit, Approve, Reject, Send Back and Complete
Creating an Action
- Select a status in the Workflow canvas.
- Click Add Action.
- Configure the properties in the right-hand panel.
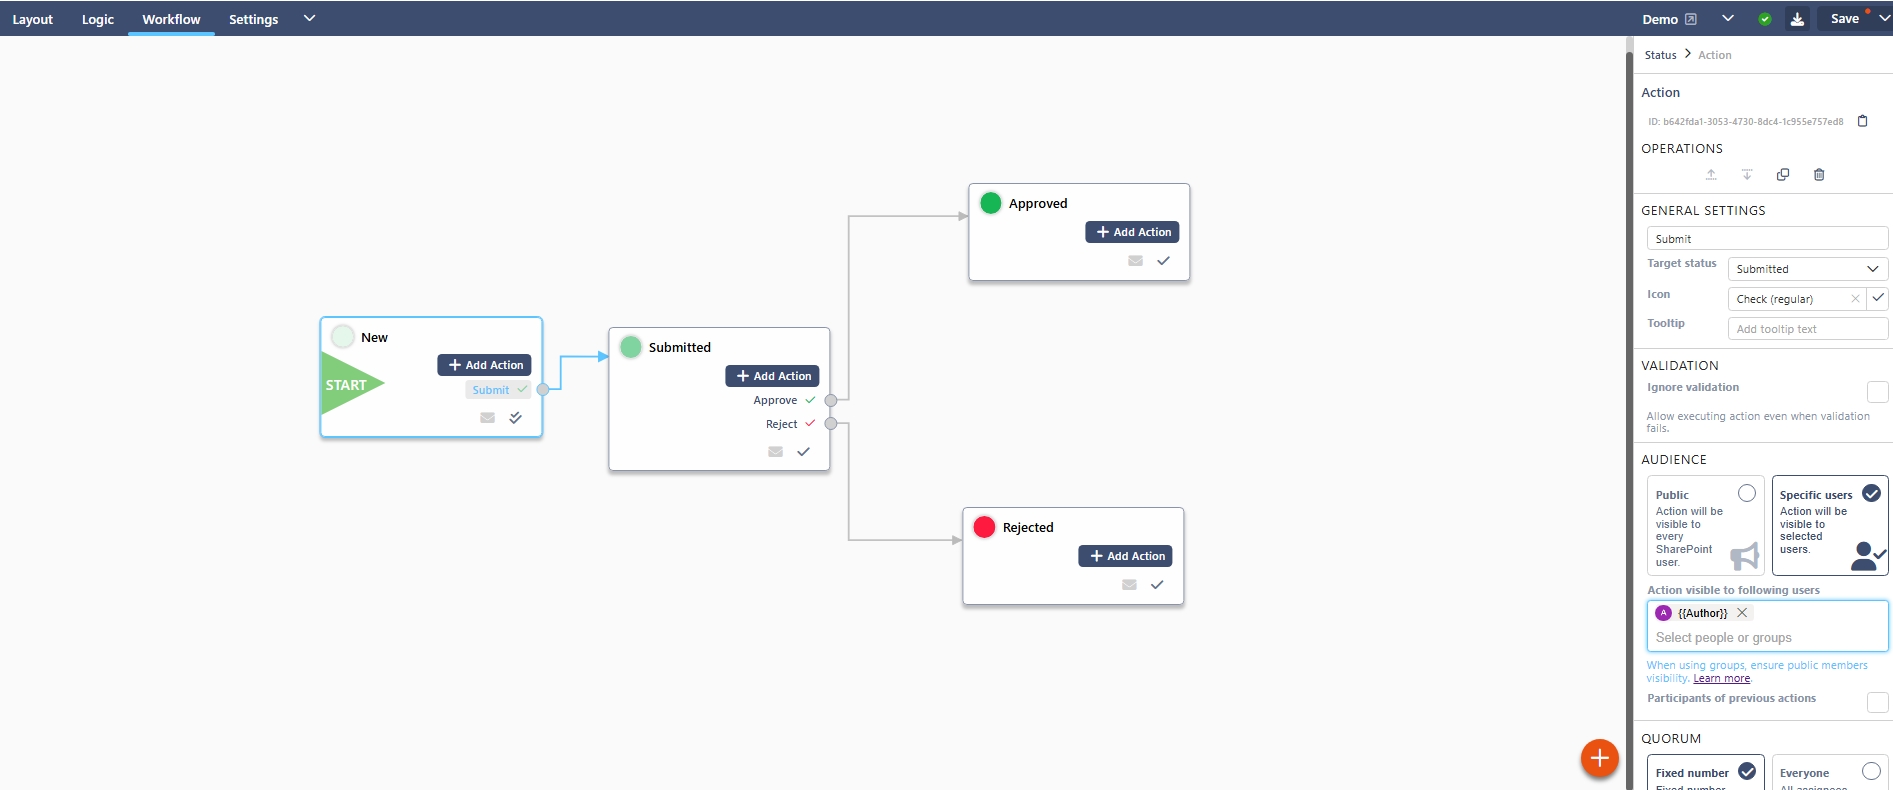
On the right-hand panel, you will see the action properties
– General Settings
Action Name
The label displayed on the button.
Use clear, action-oriented wording (e.g. Submit Request, Approve, Reject).
Target Status
The status the form moves to after the action completes.
Every action must have a target status.
– Validation
Ignore Validation
Allows the action to run even if form validation rules fail.
– Audience
Defines who can see and perform the action. If a user is not in the audience, they will not see the button.
Options include:
- Public – Visible to everyone. You can also choose to include external users by selecting ‘Include external users‘ This allows external collaborators (if enabled in Settings) to perform the action. Only use this when external access is intentionally configured.
- Specific users – Only selected users or groups – search by name or else type {{ to view options like Created By or Person Fields. You can also select ‘Participants of previous actions‘.
– Quorum
Controls how many users must complete the action.
Options may include:
- Fixed number
- Everyone
Example 1
If five approvers are selected and a quorum is set to 2, any two approvals complete the action.
Example 2
– Confirmation
You can require a confirmation pop-up before the action completes. You can also require comments and signatures.
Example 1 – Rejection with Mandatory Comment
Action: Reject
Confirmation: Enabled
Message: “Are you sure you want to reject this request?”
Comments: Mandatory
Use case:
Ensures the approver provides a reason for rejection, which is then visible in Workflow History.
Example 2 – Final Approval with Digital Signature
Action: Approve
Confirmation: Enabled
Message: “By approving, you confirm this request complies with company policy.”
Comments: Optional
Signature: Required
Use case:
Adds accountability for high-risk approvals (e.g. financial or compliance-related decisions).
Example 3 – Escalation Warning
Action: Escalate to Director
Confirmation: Enabled
Message: “This action will escalate the request to senior management. Continue?”
Comments: Optional
Signature: Not required
Use case:
Prevents accidental escalation and ensures the user consciously confirms the action.
– Redirect
Define where users are redirected after the action completes.
Options include:
- Default (return to list), e.g., an IT Helpdesk form where staff submit multiple tickets per day and need to return to the list to create another request.
- Form in Edit mode, e.g., an internal onboarding form where HR submits the first section and then immediately continues editing to complete employment setup details
- Custom URL, e.g., after submitting a training request, redirect the user to a SharePoint page explaining the next steps and expected approval timelines. Or: Redirect to an external HR system dashboard.
- Site Homepage, e.g. a Health & Safety site, where, after submitting an incident report, users are redirected back to the site homepage containing guidance documents and contact information.
– Notifications
Enable Send Email to notify assigned users when the action is available.
Note: Notifications are only sent when actions are not publicly visible.
– API Integration
The Allow automated submission option enables an action to be triggered programmatically via the Sintel Apps API. When enabled, the action can be executed without a user manually clicking the button in the form interface.
This is typically used for integrations or system-driven processes. More information
In Summary
Actions drive workflow movement.
They control:
- Who can act
- What happens next
- Whether approval is required
- What notifications are sent
Well-designed actions ensure a controlled and predictable process.