Search for answers or browse articles about Sintel Apps
Understanding Steps
Steps define what happens when a rule evaluates to true or false.
If conditions answer “when”, steps answer “what”.
Steps are placed into:
-
Steps when conditions are met
-
Steps when conditions are not met
You can use either of these or both.
Form Steps
– Form Features
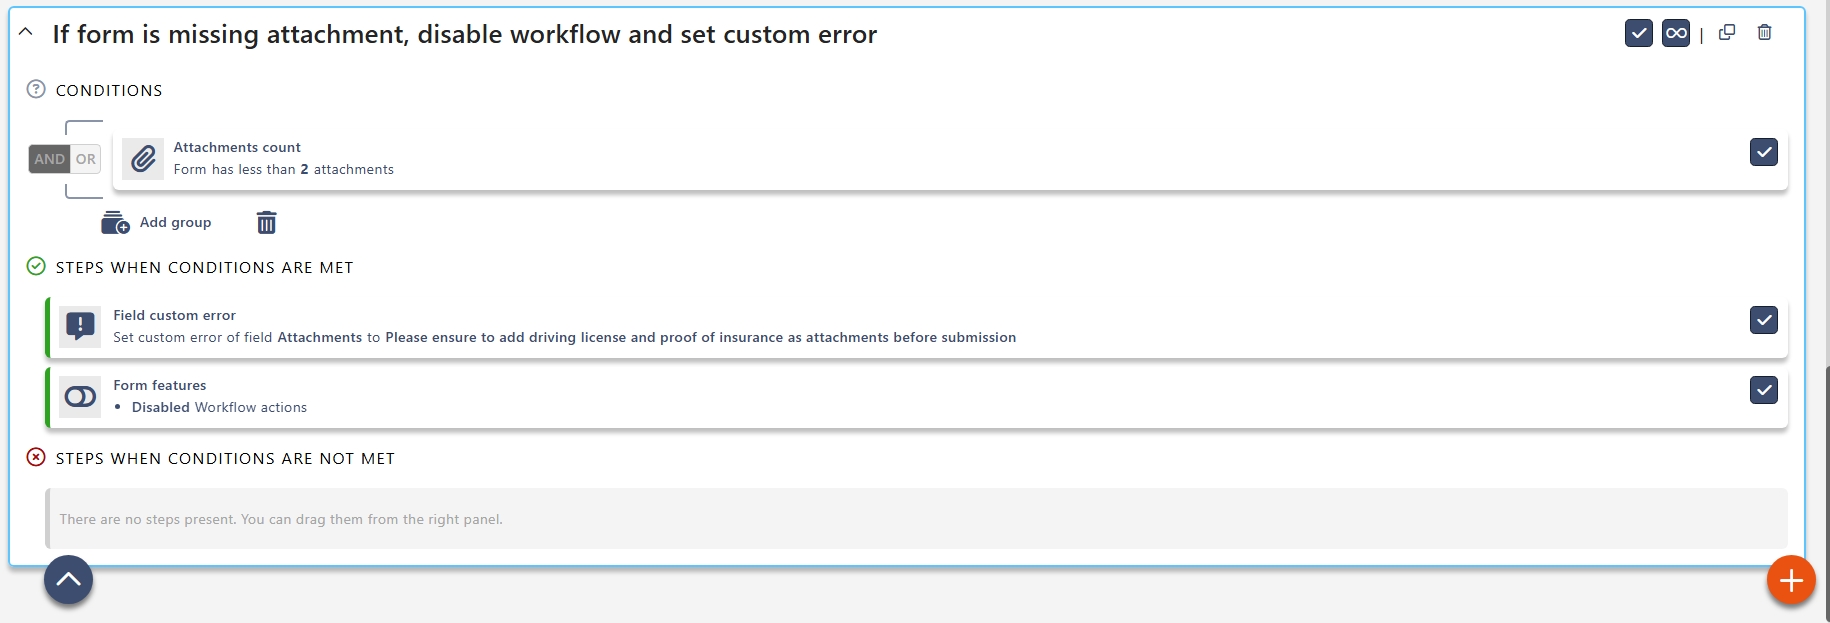
The Form Features step allows you to control global form components and behaviour.
You can modify elements such as:
-
Save button
-
PDF Export button
-
Workflow history panel
-
Attachments panel
-
Conversations panel
-
Workflow action buttons
-
Entire form read-only mode
Each can be set to:
-
Available – The feature is fully usable.
-
Disabled – Visible but not clickable.
-
Hidden – Completely removed from view
Form Features are useful when:
-
You want to prevent saving under certain conditions.
-
You want to disable attachments after submission.
-
You want to hide workflow history from external users.
-
You need to lock the entire form once it reaches a specific workflow status.
-
You want to restrict PDF export until approval.
– Ignore validation
The Ignore Validation step allows the form to save even if required fields or validation rules would normally prevent submission.
This applies only to the current save action and should be used carefully.
Common scenarios:
-
Saving a draft before all required information is complete.
-
Allowing a “Save as Draft” workflow action.
-
Allowing administrators to bypass validation rules.
-
Emergency submission processes where incomplete data is acceptable temporarily.
Section Steps
– Set section title
This allows you to dynamically change the heading of a section.
Useful for:
-
Adapting wording based on user selections.
-
Personalising content for internal vs external users.
-
Reflecting workflow stages.
Example:
If Request Type = Project
Set section title to Project DetailsIf Request Type = Purchase
Set section title to Purchase DetailsThis avoids duplicating sections and keeps forms cleaner.
– Set section description
This allows you to change the explanatory text under a section heading dynamically.
Useful for:
-
Providing contextual guidance.
-
Displaying instructions only when relevant.
-
Showing policy reminders for specific departments.
Example:
If Department = Finance
Set section description to:
“Please ensure all financial codes are validated before submission.”
– Set section visibility
Controls whether an entire section is:
-
Visible
-
Hidden
This is one of the most commonly used logic steps.
Best practice:
Always define the opposite behaviour in the “not met” section.
Example:
Condition: Request Type equals Project
Steps when met: Project Details section → Visible
Steps when not met: Project Details section → Hidden
This prevents sections remaining visible after values change.
– Set section state
Controls whether a section is:
-
Required
-
Optional
-
Read-only
Useful for:
-
Locking sections after submission.
-
Making entire sections mandatory.
-
Preventing edits during approval stages.
Example:
Condition: Workflow Status equals Submitted
Steps when met: Set Financial Details section to Read-only
This ensures data integrity during review.
Field Steps
Field actions control individual field behaviour.
– Set Field Label
Allows you to dynamically change the display label of a field.
Useful for:
-
Adjusting wording based on context.
-
Reusing the same field for multiple purposes.
-
Localising terminology for different audiences.
Example:
If Request Type = Travel
Set field label from “Reference” to “Booking Reference”This reduces the need to duplicate fields.
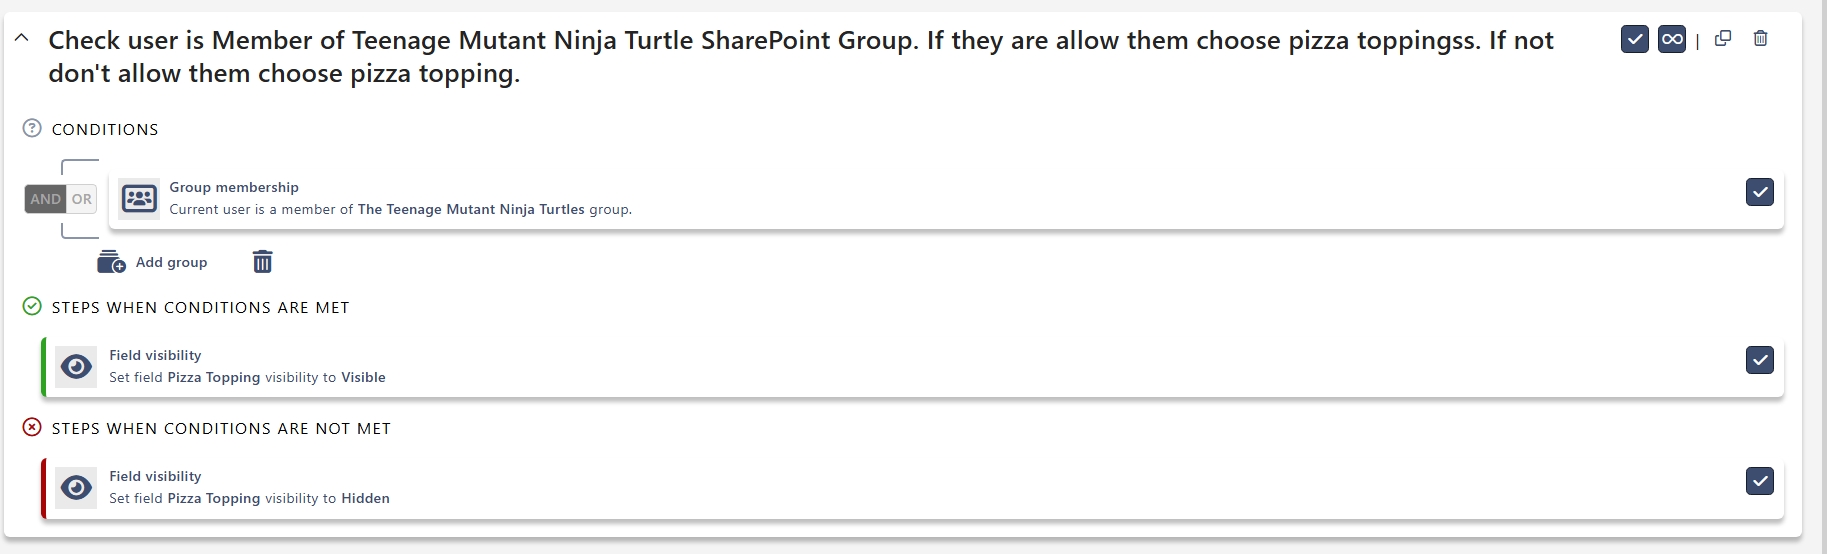
– Set Field Visibility
Controls whether a field is:
-
Visible
-
Hidden
Example:
Condition: Department equals Finance
Steps when met: Cost Code → Visible
Steps when not met: Cost Code → Hidden
– Set Field State
Controls whether a field is:
-
Required
-
Optional
-
Read-only
Common example:
Make “Cost Code” required when Department = Finance.
– Set Custom Error
Displays a validation message.
Example:
“End Date must be on or after the Start Date.”
Related List Steps
– Related List Behaviour
Controls:
-
Adding
-
Editing
-
Deleting related list items
Useful for:
-
Preventing changes after submission
-
Locking financial line items during approval
Tab Steps
– Set tab visibility
Set a tab’s visibility to:
-
Visible
-
Hidden
Used in large multi-tab forms.
Example use cases:
-
Show “Finance” tab only to Finance users.
-
Hide advanced settings from standard users.
-
Display additional tabs only after submission.
Other Steps
– Workflow Action
Allows you to:
-
Hide or disable specific workflow actions
Example:
Only show “Approve” when:
Status = Submitted
User is in Approvers group
– Custom Button Visibility
Controls the visibility of custom buttons created in the Buttons widget.
Example:
Show “Generate PDF” only after approval.
– Custom JavaScript
Allows execution of JavaScript when a rule runs.
Used for advanced scenarios such as:
-
Complex calculations
-
External API calls
-
Dynamic behaviour beyond standard steps
Use sparingly and document clearly.