We live in a world where remote working and paperless offices have become the norm.
This means that electronic signature capabilities have become a must for getting documents signed. The integration of electronic signatures into your forms will help streamline your business processes and reduce issues.
Our electronic signatures provide a seamless experience allowing both internal and external users to apply their personal signatures to your forms. It also allows you to insert a widget into the form so that when you export it to PDF, all of the signatures will be included.
This is not only convenient but also reduces costs and delays in getting forms signed by multiple people.

Reduce your businesses dependence on paper.
Paper-based processes often involve printing forms and then either posting them or circulating them through internal mail. This is a time consuming and costly process. It is also prone to error and forms can be incorrectly completed or signatures can be added in the wrong place.
At Sintel we create solutions to enable organisations to work more efficiently so that they can focus on their core business.
Check out this legal form in relation to a Personal Injuries case.
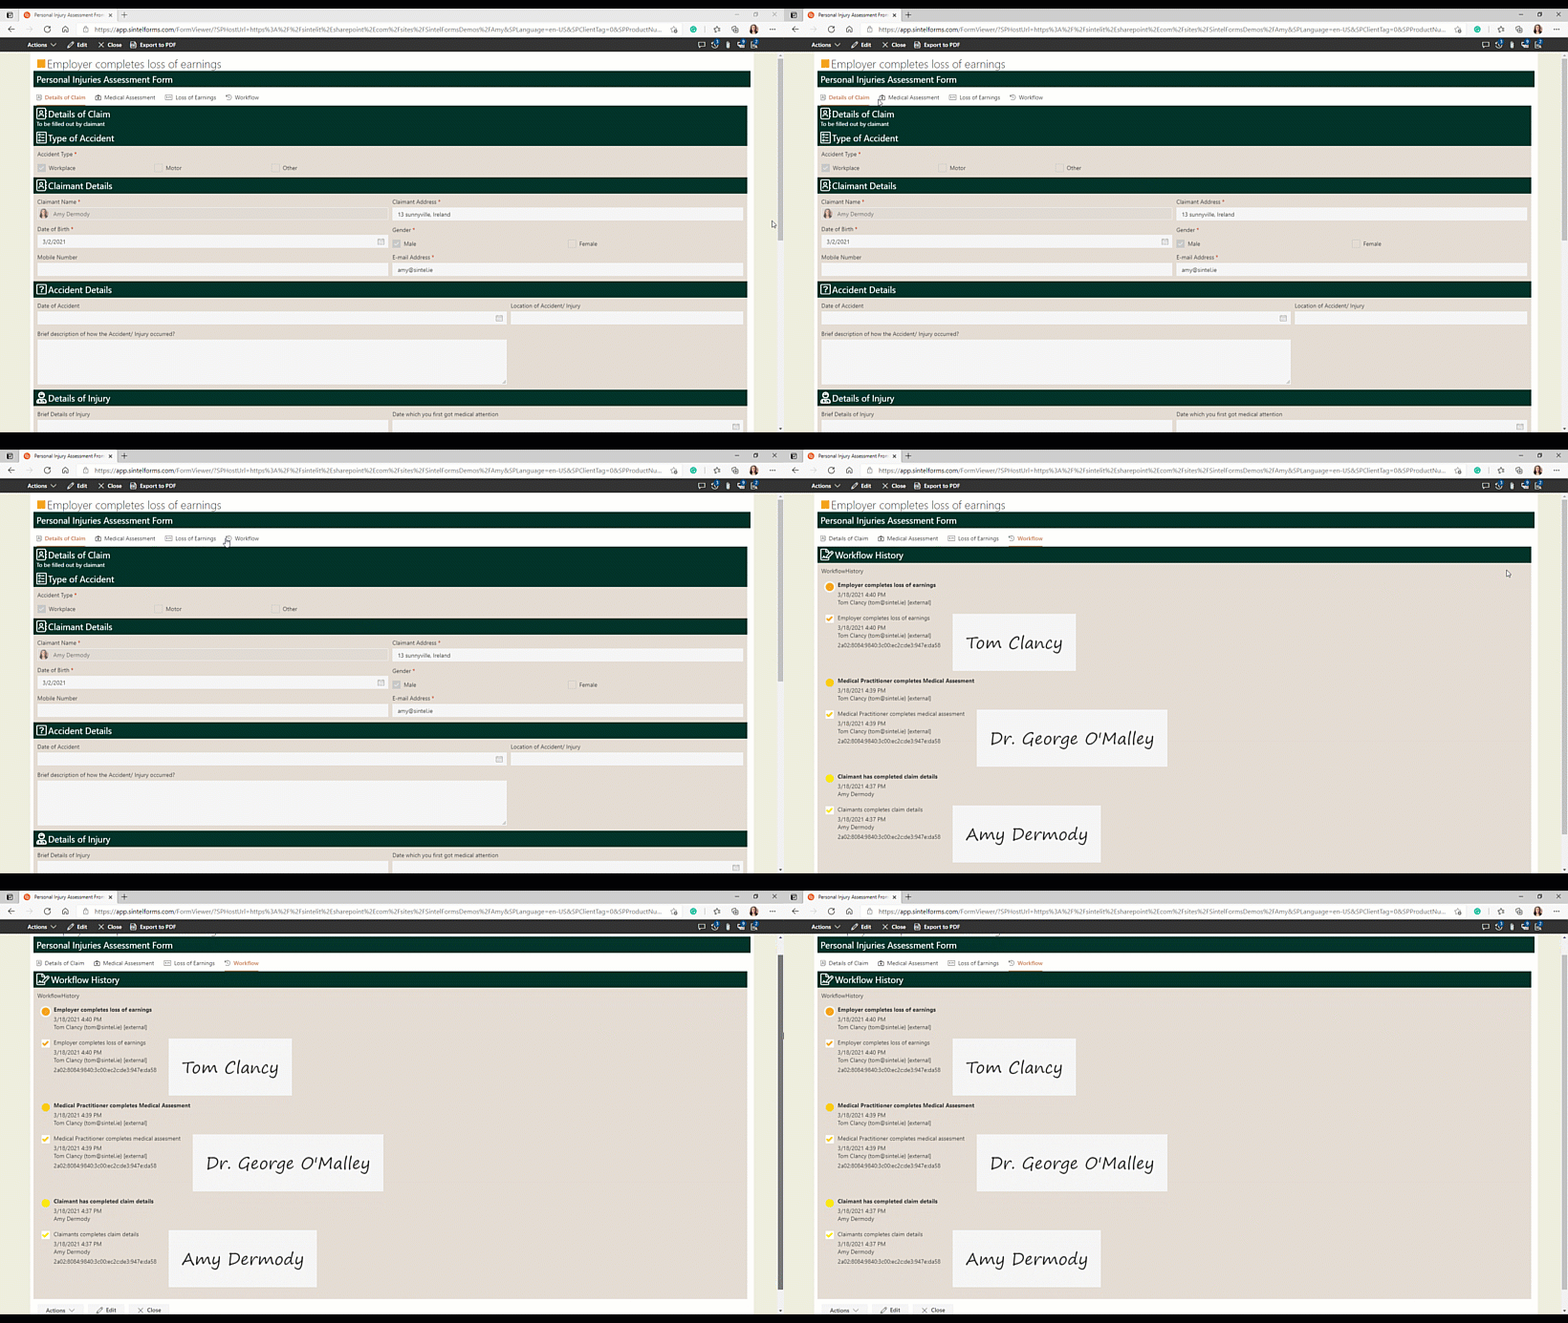
A legal form that required the signature of three external users.
The form has three parts:
- Details of the claim
- A Medical Assessment Form
- A Loss of Earnings Report
The form requires signatures from the client, their doctor and their employer respectively.
It also has the workflow history embedded directly into the form so that when you generate a pdf form at the end of the workflow process, it includes the workflow history/audit trail on the last page. The last page will contain everyone’s electronic signature including their Name, Email, Approval date & IP Address.
You can add this feature to your forms in 3 simple steps.
- Step 1-Add the signature requirement
- Step 2-Add a workflow history widget
- Step 3-Give access to external users
Step 1: Add the Signature Requirement
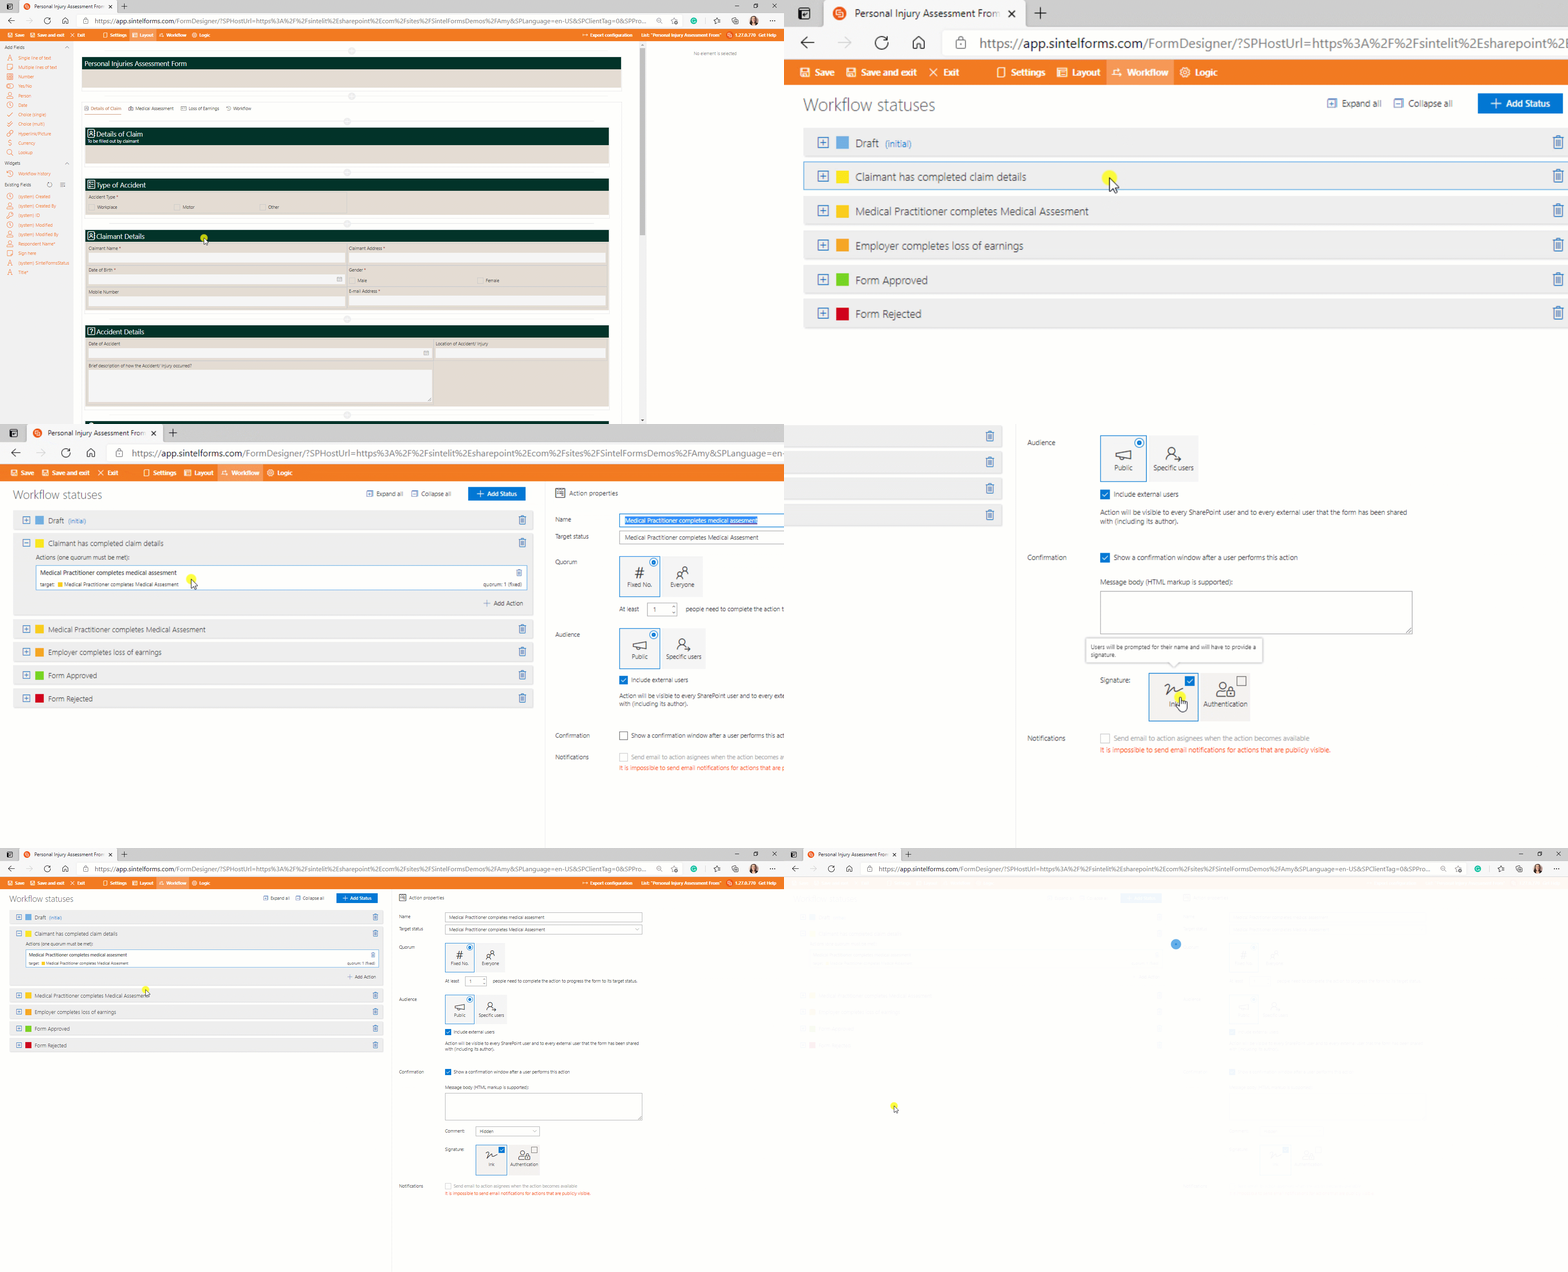
How to add a signature requirement.
Go to the Sintel Forms Designer → Select the Workflow screen → Select one of your workflow statuses and select the action to which you would like to add a signature requirement. → Select ‘show a confirmation window after a user performs this action’ → Select ink signature.
You also have the option to require the person to leave a comment & for internal users, you can add an option to get them to authenticate who they are.
Step 2: Add a workflow history widget
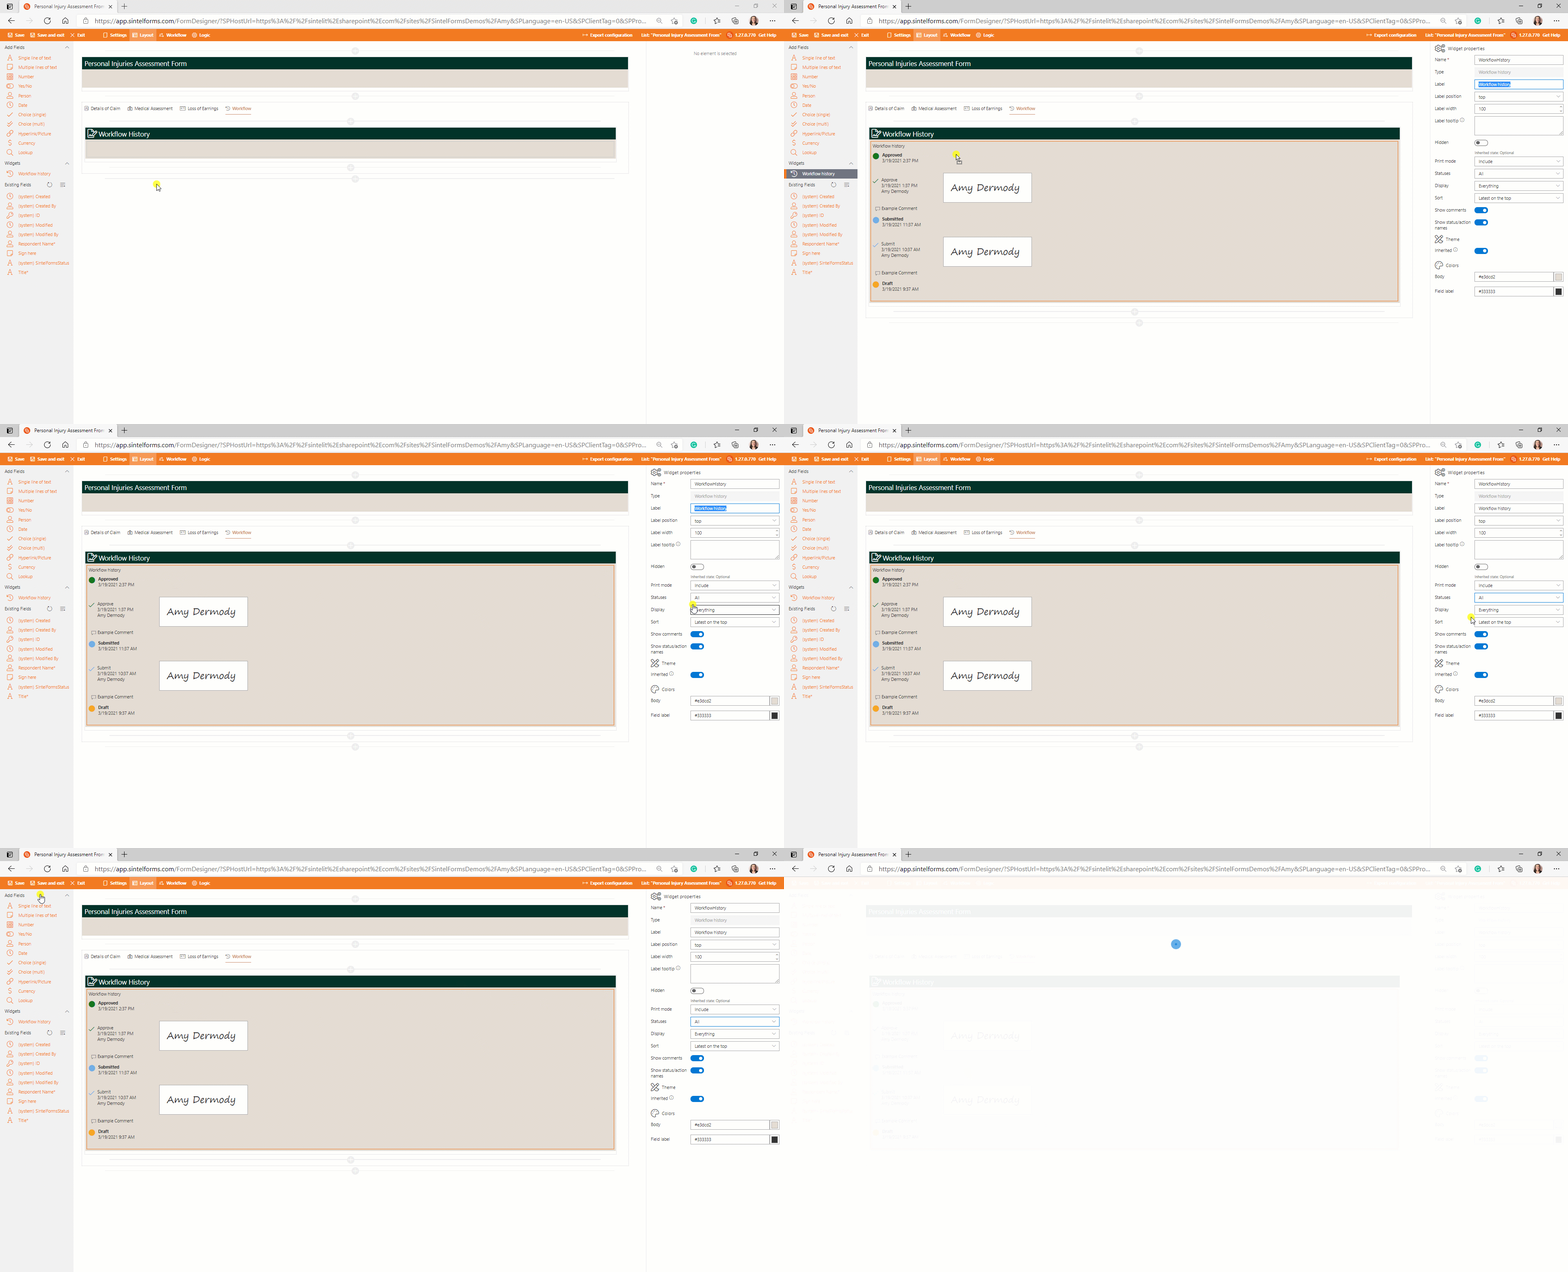
Adding the Workflow History Widget
Adding the Workflow History Widget couldn’t be easier. You need to go to the Layout screen and drag the workflow history widget into the container where you want it to appear. For more information about Workflow History Widgets click this link.
Step 3: Give access to external users
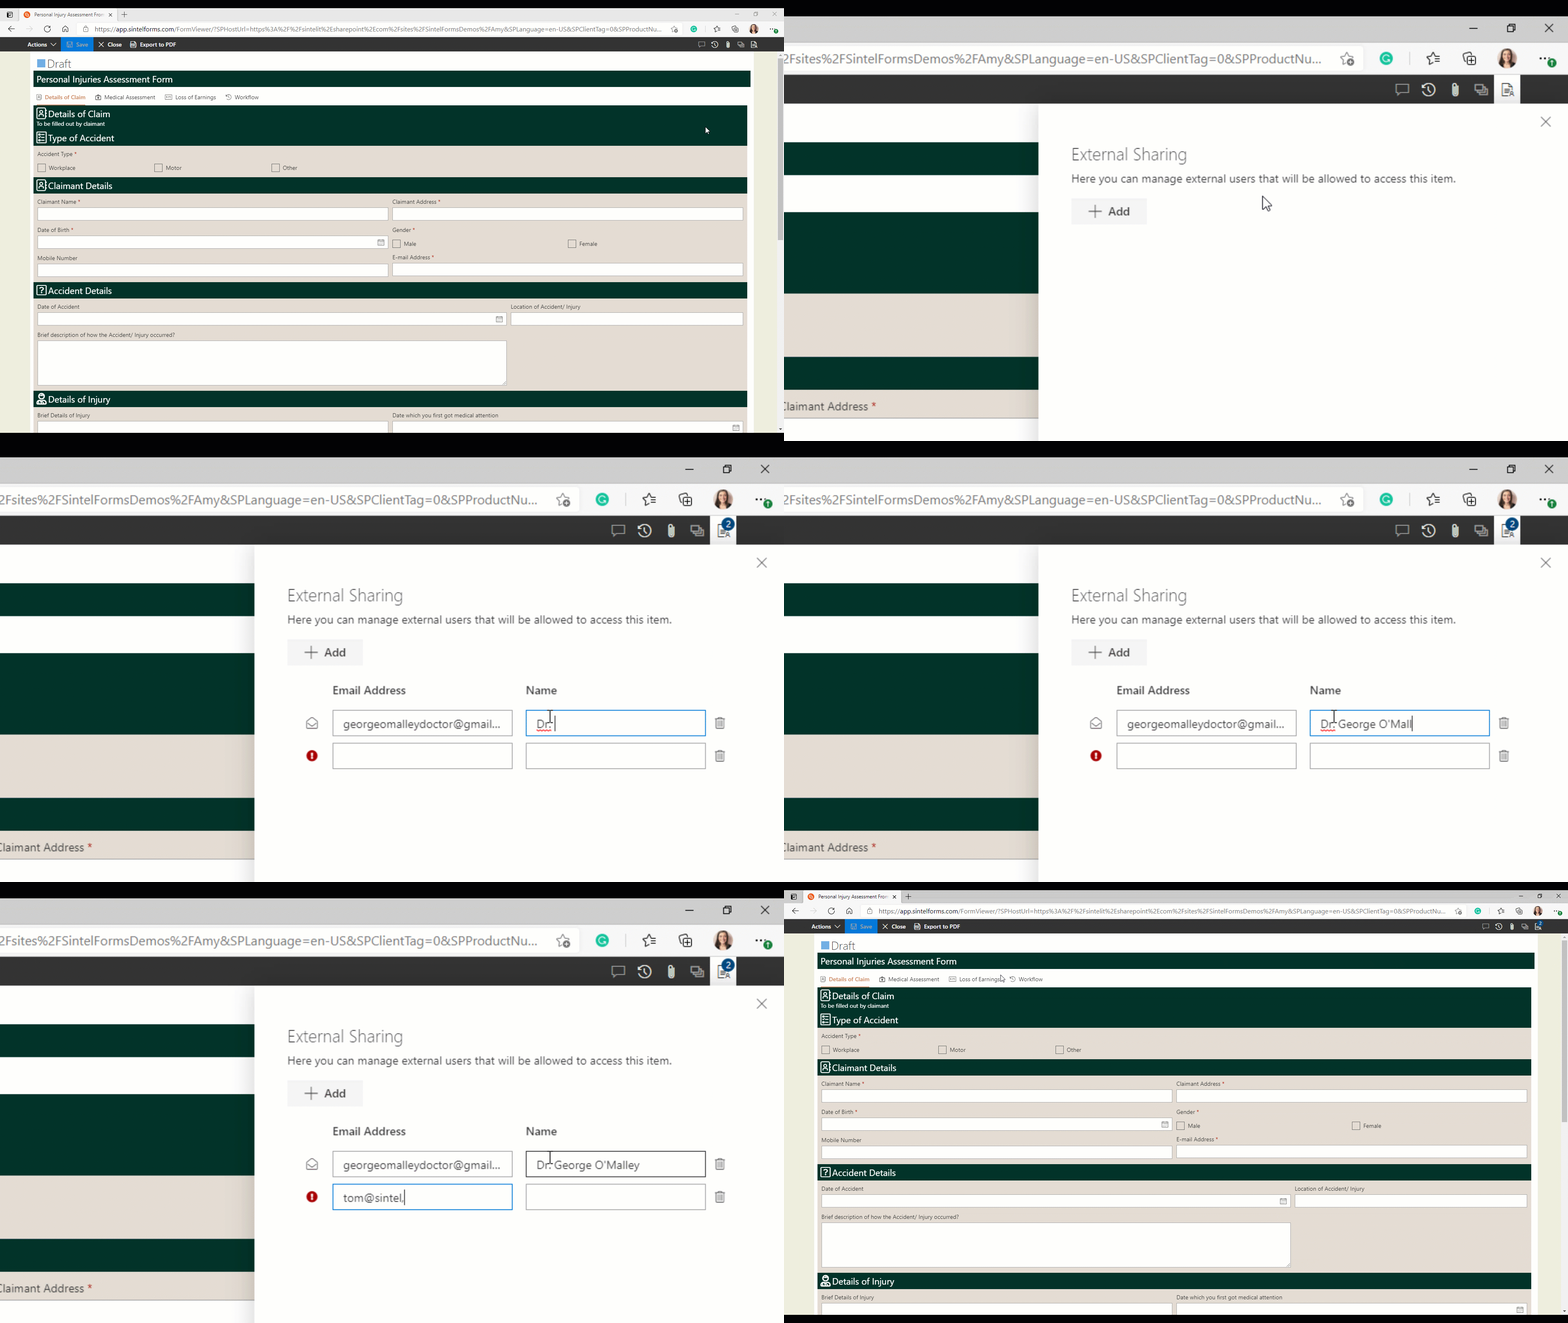
Give Access to External Users.
Once you are ready to give people access to the form you need to enable External Sharing in the Settings screen. You will then be able to share the form securely with 1 or more external users.
The End Result
The end result is a secure form that is responsive and can be signed on the go on any device by all parties involved in the claim.
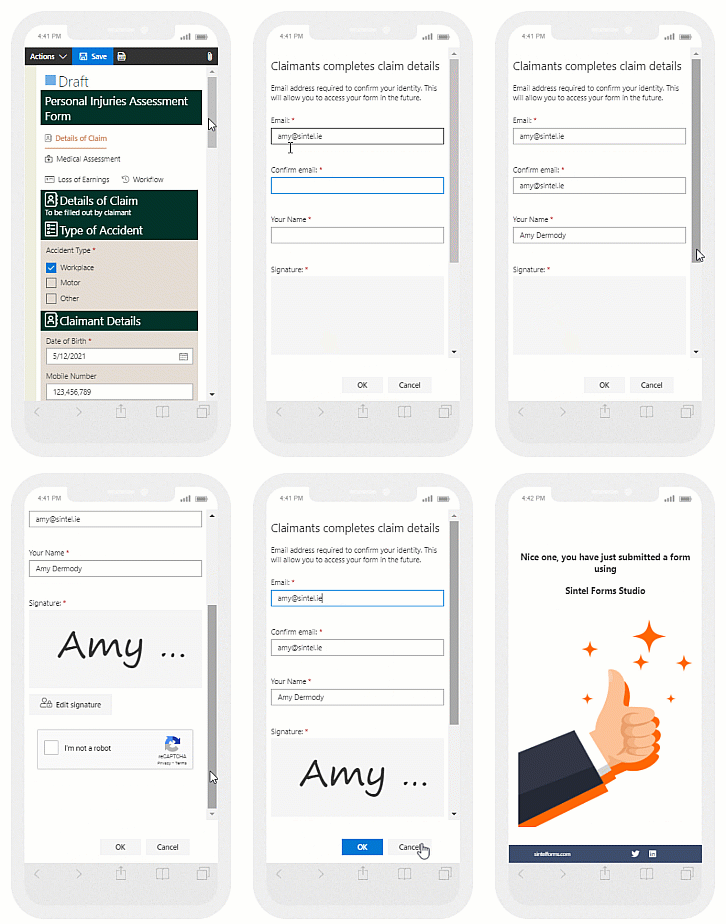
Sign your form on the go.
Check out the video below to see the form being filled out and signed in real-time by all three users.




0 Comments